Felt Christmas Ornaments to Make
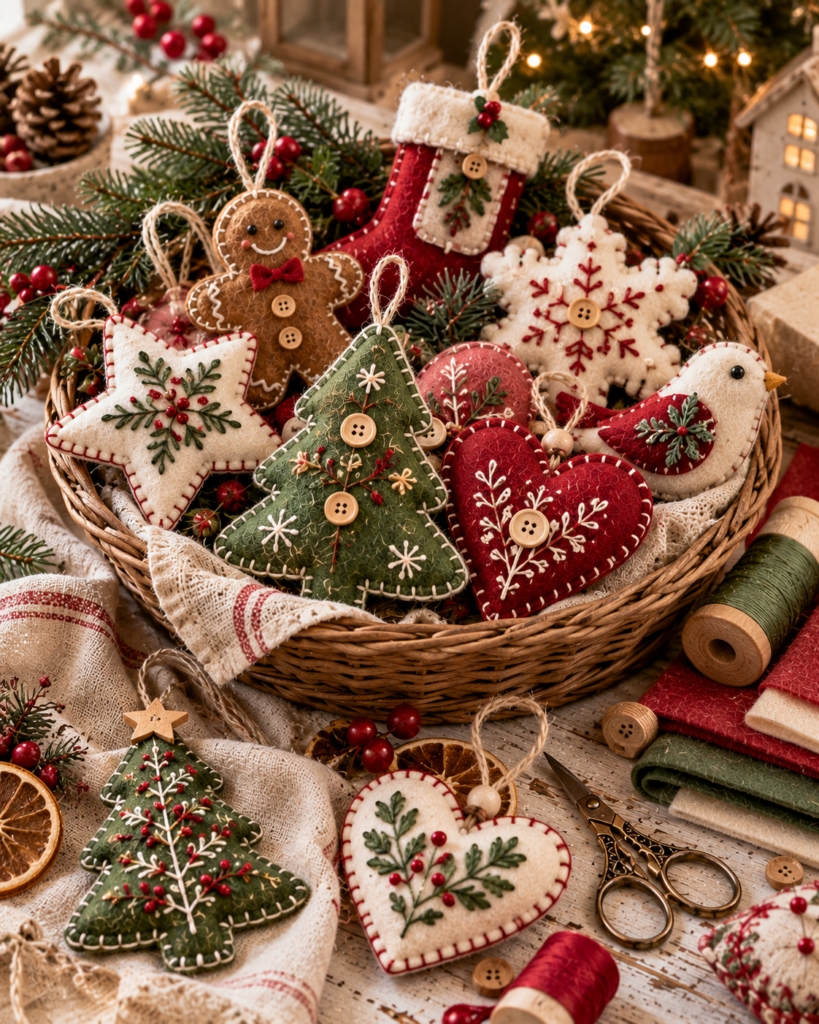
Making felt Christmas ornaments is one of the most satisfying holiday crafts because the supplies are affordable, the techniques are beginner-friendly, and the results look charming on any tree. If you are new to hand sewing or crafting with felt, this is a forgiving project: felt does not fray, small mistakes are easy to hide with embroidery or trim, and you can finish an ornament in an evening. In this guide, you will learn which felt works best, how to cut clean shapes, how to stitch and stuff without lumps, and how to add a sturdy hanging loop that will not rip out. I will also share several classic ornament designs you can customize for your own color palette and style.
Supplies You Need
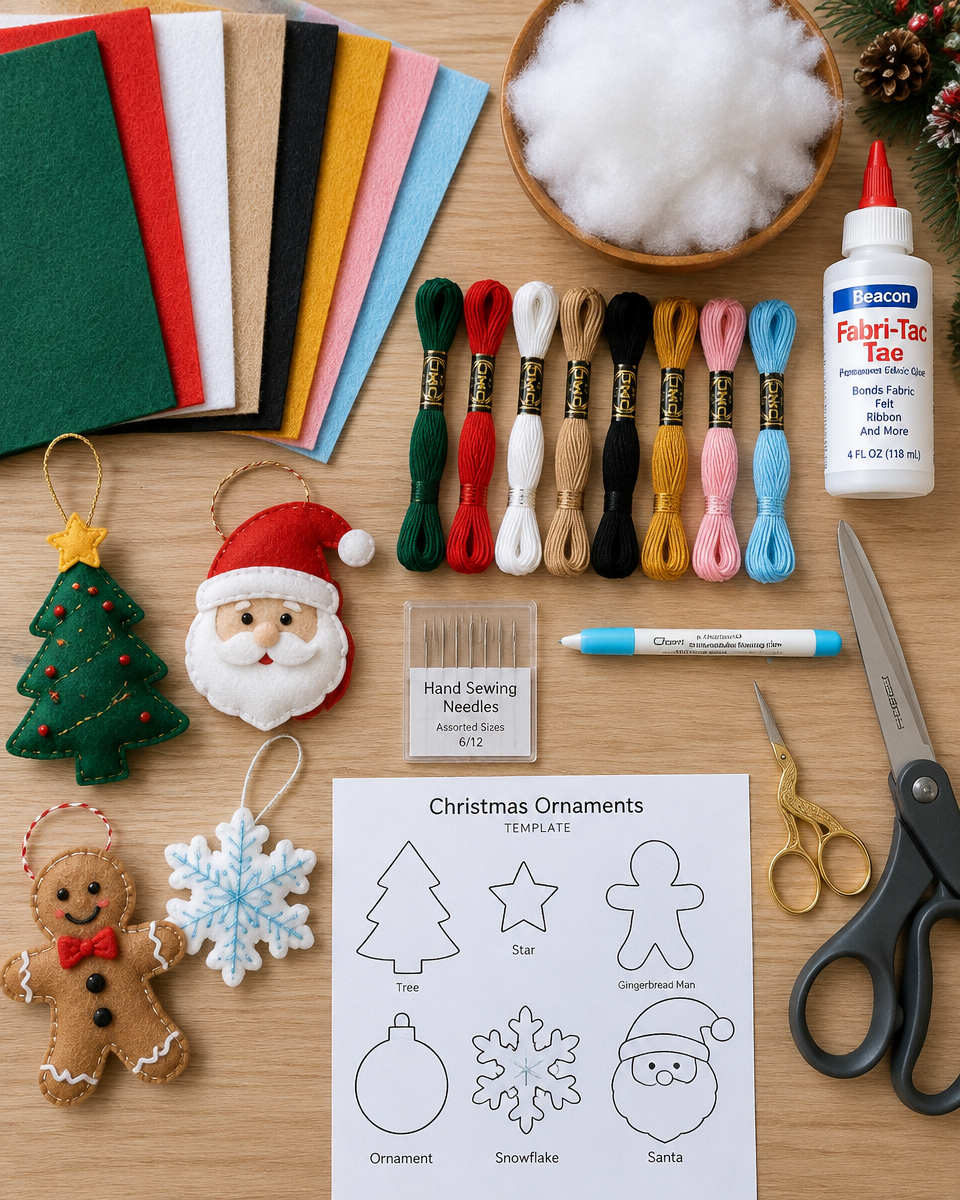
You can make felt Christmas ornaments with a small set of tools, but choosing the right basics makes your ornaments cleaner and longer-lasting. Here is a practical supply list with notes on what matters most:
- Felt sheets: Buy a few core colors (green, red, white, tan, black) plus accent colors (gold, pink, light blue). Having contrasts helps details show up from across the room.
- Sharp fabric scissors: Reserve these for fabric only. Dull blades chew the felt edge and create fuzz that is hard to remove.
- Small detail scissors (optional): Helpful for tight curves, inside corners, and tiny notches.
- Embroidery floss: Use 6-strand cotton floss. You can separate strands for thinner stitching or keep 2 to 3 strands together for bolder lines.
- Hand sewing needles: A size 7 to 9 embroidery needle is a good all-around choice. A needle threader is handy for quick color changes.
- Polyester fiberfill: Lightweight stuffing that dries quickly if the ornament is exposed to humidity.
- Fabric-safe glue (optional): Great for attaching tiny pieces when sewing is fiddly, but use sparingly to avoid stiff, shiny spots.
- Marking tool: Tailor’s chalk or a washable fabric marker. Test on a scrap first.
- Template material: Cardstock or thin cardboard makes reusable patterns that stay crisp.
Optional upgrades include pinking shears for decorative edges, sequins or beads for sparkle, and ribbon for hanging loops. Keep a small trash dish nearby because felt lint adds up quickly while trimming details.
Best Felt for Christmas Ornaments
The best felt for felt Christmas ornaments depends on the look you want and how long you hope the ornaments will last. Craft felt (often polyester) is inexpensive and easy to find. It works well for kid-friendly projects and ornaments that are mostly flat. The downside is that it can pill over time and may stretch if pulled tightly with stitches.
Wool blend felt (often 20 to 40 percent wool) is my favorite for ornaments you will store and reuse for years. It cuts cleaner, holds crisp edges, and takes embroidery beautifully. It also resists pilling better than cheap craft felt. Pure wool felt is gorgeous and very durable, but it is pricier and sometimes harder to source locally.
Thickness matters as much as fiber content. For ornaments, look for felt that is about 1 to 1.5 mm thick for layered flat designs and 1.5 to 2 mm for stuffed ornaments. Very thin felt can warp when stuffed, and very thick felt can be hard to stitch through neatly.
Before starting, pre-plan color pairings. Felt colors can shift under tree lights, so choose high-contrast embroidery thread for outlines and facial features. If you are making a set, cut all pieces assembly-line style so the shapes match closely across multiple ornaments.
Felt Christmas Ornament Ideas to Make
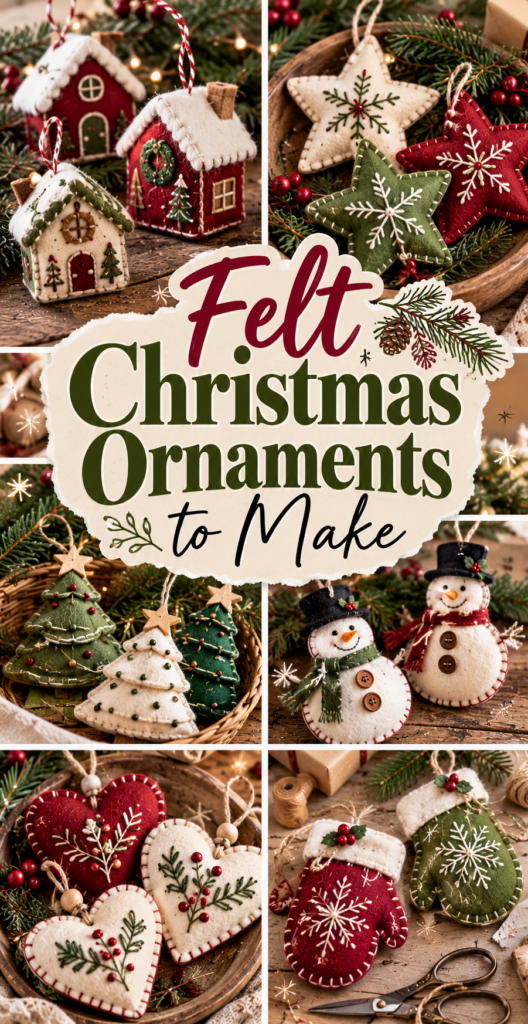
If you are brainstorming felt Christmas ornaments, start with simple silhouettes and then add personality through stitching, layering, and tiny embellishments. The best designs use 2 to 5 felt colors and repeat a few consistent details, like French knots for “snow,” blanket stitch borders, or a contrasting outline. Below are three idea families that are easy to batch-make, which is perfect if you are crafting for gifts, swaps, or a full tree theme.
Trees and Stars
Tree ornaments can be basic triangles or tiered “stacked” layers. Add garland lines with backstitch, then dot on “ornaments” using small seed beads or embroidered French knots. Stars are great beginner shapes because the points hide minor cutting imperfections. Try a two-layer star with a smaller star on top, or stitch radiating lines from the center for a quilted look. For a modern vibe, make a monochrome set in cream and gold with simple running stitches.
Stockings and Mittens
Stockings are ideal for personalization. Add a tiny felt cuff in a contrasting color and embroider a single initial. Mittens look adorable in pairs: sew a small “string” between them using embroidery floss, or make mini “fair isle” patterns with simple straight stitches. These also make great gift toppers because you can tie them onto packages with the hanging loop.
Gingerbread and Snowmen
Gingerbread people are forgiving and fun to decorate. Use white floss for icing outlines, rosy cheeks with small circles of felt, and tiny buttons as beads. Snowmen are easy to layer: two or three stacked circles plus a scarf strip. If you worry about small parts, stitch eyes and buttons instead of gluing. Embroidered faces last longer and survive storage better.
How to Make a Simple Felt Christmas Ornament
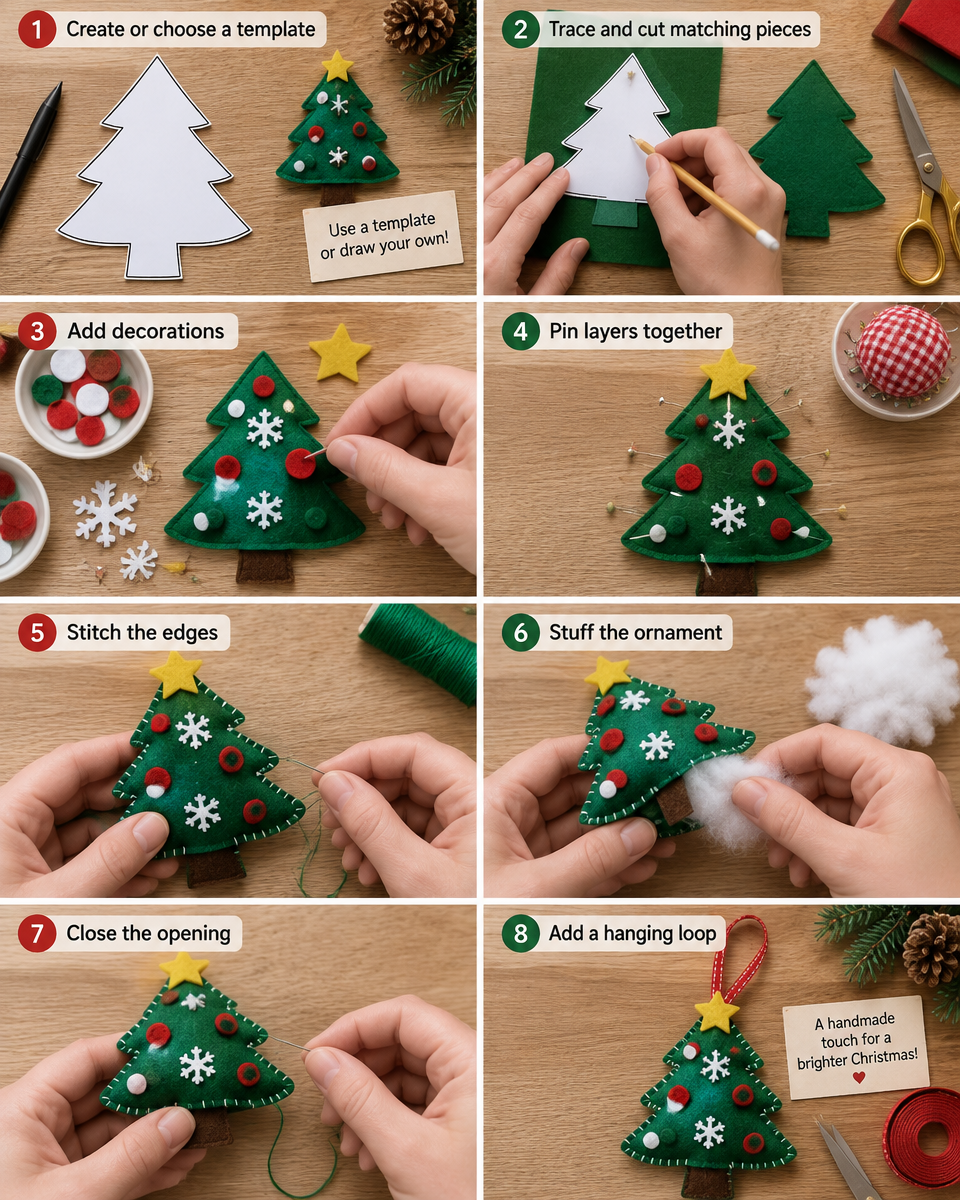
This step-by-step method works for most basic felt Christmas ornaments, including stars, hearts, trees, and simple characters. Plan on 30 to 60 minutes per ornament at a relaxed pace, depending on embellishment.
- Create or choose a template: Draw a simple shape on cardstock and cut it neatly. A firm template keeps both felt layers identical, which prevents a twisted look after stitching.
- Trace and cut two matching pieces: Trace lightly onto the back of felt. Cut with long, smooth scissor strokes rather than lots of tiny snips to avoid jagged edges.
- Add decorations to the front piece first: Stitch facial features, stripes, or small appliqué shapes now. Once the ornament is assembled, it becomes much harder to sew details cleanly.
- Pin or clip layers together: Align edges carefully. If the shapes shift while you sew, your border stitch will look uneven.
- Stitch around the edge: Use blanket stitch (or whip stitch for a simpler look) leaving a 1.5 inch opening for stuffing. Keep stitch spacing consistent for a polished finish.
- Stuff lightly and evenly: Add small tufts of fiberfill and push them into corners with the blunt end of a chopstick or pencil. Overstuffing can stretch the felt and distort the outline.
- Close the opening: Continue stitching until you reach your starting point. Tie off on the back and bury the knot between layers if possible.
- Add the hanging loop: Attach a ribbon or floss loop at the top with a few firm stitches. Test by holding the ornament up and gently tugging.
If you are making several ornaments, do each step in batches: cut everything first, then decorate fronts, then assemble. It saves time and thread.
How Do You Cut Felt Neatly?
Clean cutting makes felt Christmas ornaments look instantly more professional. The biggest secret is sharp tools and steady technique. Use fabric scissors that have not been used on paper. Paper dulls blades quickly and causes fuzzy, snagged felt edges.
For tracing, draw on the back side of the felt and keep your markings minimal. Thick marker lines can show through pale felt, and aggressive rubbing can stretch the fabric. When cutting, hold the felt flat on the table and keep the lower scissor blade against the surface. Cut with long strokes where possible, rotating the felt rather than constantly pivoting your hand. This reduces choppy edges and keeps curves smooth.
For tight corners, cut just up to the point, then turn the felt and cut the next line. Avoid “biting” at the corner with multiple tiny snips, which creates little steps. If you need interior cutouts (like a stocking notch), fold the felt gently and make a small starter snip, then carefully cut along the line. For very small shapes like cheeks or tiny stars, consider using small detail scissors so you can control the curve.
Finally, keep your pieces organized. Felt shapes are lightweight and easy to lose. I like to place each ornament’s pieces into a small bowl or labeled sandwich bag until assembly time.
What Is the Best Stitch for Felt Ornaments?
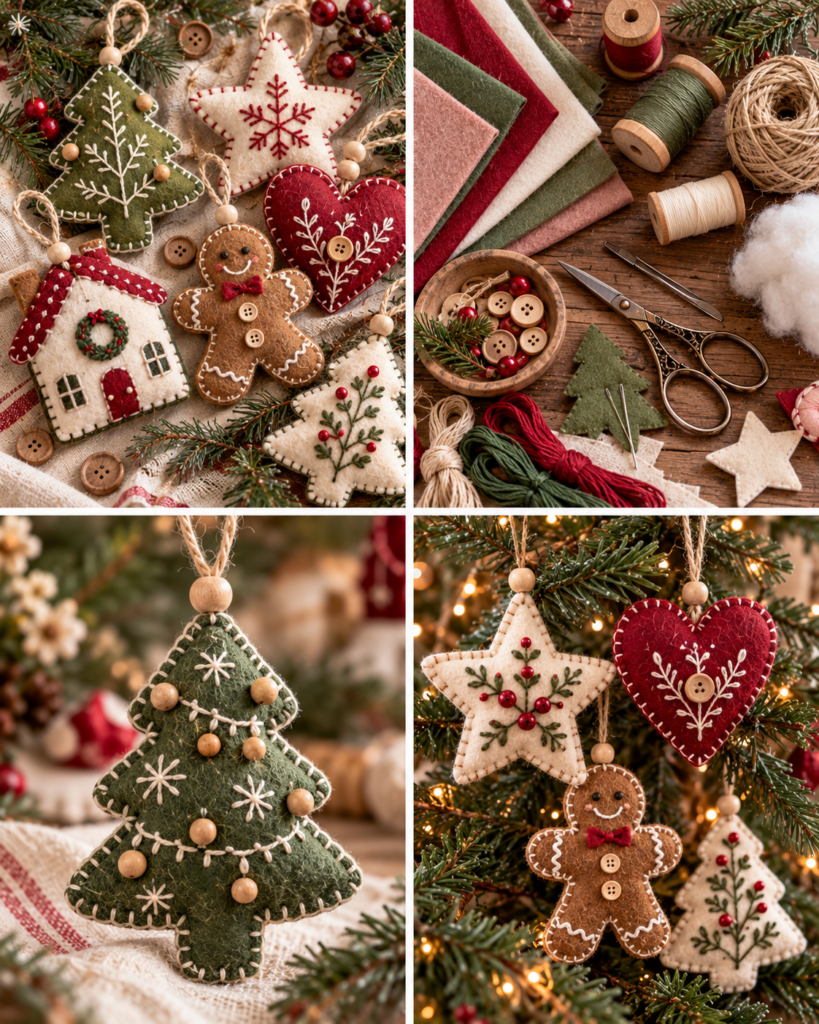
The best stitch for felt Christmas ornaments depends on the style you want and your comfort level. For most beginners, blanket stitch is the top choice because it looks decorative and reinforces the edge. The stitch forms a neat border line, and the little “bars” sit right on the edge, helping the ornament keep its shape.
If you want a simpler and faster option, whip stitch works well. It spirals around the edge and is easy to keep consistent. Use evenly spaced stitches and try not to pull too tight, or the felt edge may curl. Running stitch is best for decorative lines and details rather than joining edges, since it does not wrap the edge and can leave gaps.
Backstitch is excellent for crisp outlines, names, and pattern lines like garlands on trees or icing on gingerbread. For small dotted accents like snow, French knots add texture, but they take practice. Start with a few knots on a scrap of felt to get your tension right.
Thread choice matters: use 2 strands of embroidery floss for delicate details, and 3 strands for bolder borders. If your stitches look messy, it is usually a tension issue. Aim for snug, not tight. Felt should lie flat and smooth without puckering.
Reader testimonial: “I tried blanket stitch for the first time on a felt star, and the border made it look store-bought. My biggest improvement was slowing down and keeping the stitch spacing even. I made six more ornaments the next weekend.”
How Do You Stuff Felt Ornaments?
Stuffing is what turns flat felt Christmas ornaments into soft, dimensional keepsakes. The key is using small amounts of fiberfill and placing it intentionally. Start by pulling off tiny tufts, about the size of a grape, and rolling them lightly between your fingers. This prevents hard clumps that show as bumps on the surface.
Push stuffing into narrow points and corners first, like star tips or the top of a tree. A blunt tool helps, but avoid anything sharp that could poke through. The eraser end of a pencil or the rounded handle of a paintbrush works well. After corners are filled, add stuffing to the center, checking the front and back as you go to keep the shape balanced.
How much stuffing is enough? Aim for “gently puffy.” The ornament should hold its shape when you set it down, but the seams should not strain. If the stitches look stretched or gaps appear, remove a bit of stuffing and redistribute.
If you want a flatter, quilted look rather than a plush look, use much less fiberfill and rely on decorative stitching or layered felt shapes for dimension. You can also add a small pinch of stuffing only at the bottom of a snowman or the toe of a stocking for subtle shaping.
How Do You Add a Hanging Loop?
A secure hanging loop is essential for felt Christmas ornaments, especially if you have pets, kids, or a busy tree. The simplest option is a loop of narrow ribbon (about 1/8 to 1/4 inch wide) or a loop made from embroidery floss. Cut a 6 to 8 inch piece, fold it in half, and decide where you want the ornament to hang. For most shapes, the loop should be centered at the top.
For the strongest hold, stitch the loop into the seam as you close the ornament. When you reach the top area during blanket stitch, insert the loop ends between the two felt layers, with the loop itself sticking out. Then sew over that spot with several tight stitches. This traps the loop ends inside, distributing the pull across multiple stitches.
If the ornament is already closed, you can attach the loop with a needle and thread by stitching through the back layer only, catching a few fibers from the inside layer as well. Make multiple passes, then knot securely. Avoid gluing loops on, as glue can fail in warm storage conditions and can leave hard spots that crease the felt.
For a decorative finish, tie a small bow at the base of the loop or add a bead above the knot. Always test the loop with a gentle tug before hanging it on the tree.
Can You Make Felt Ornaments Without Sewing?
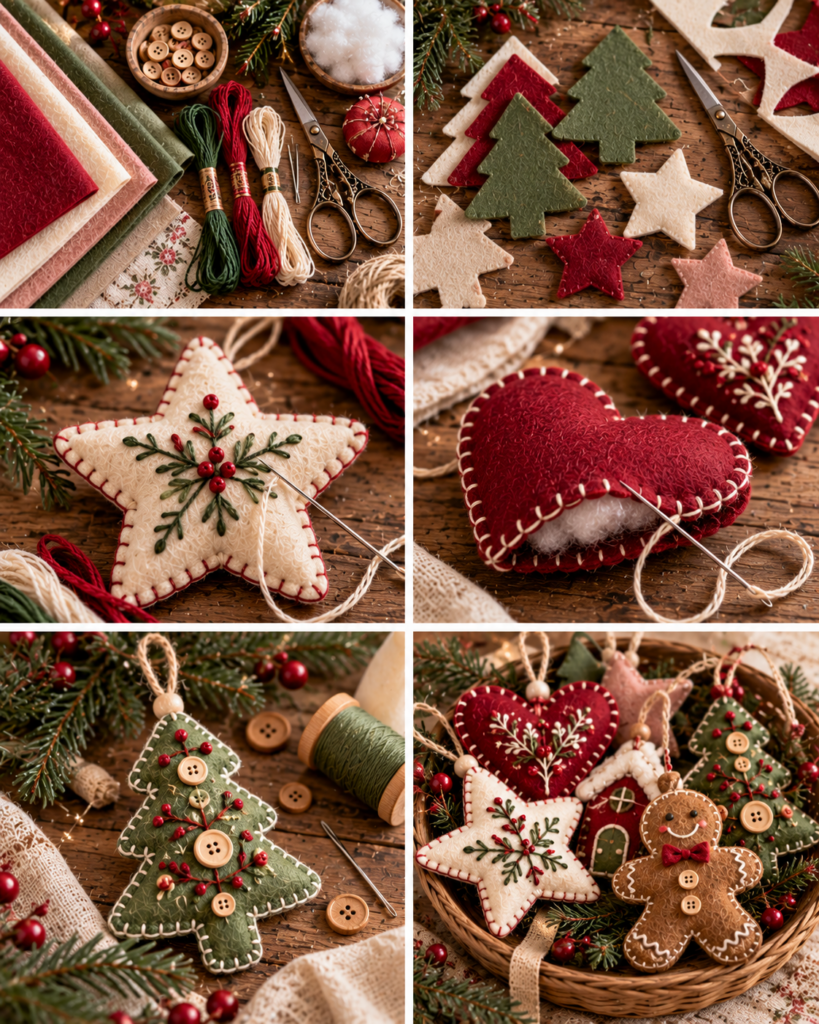
Yes, you can make felt Christmas ornaments without sewing, and it is a great approach for classrooms, quick crafting nights, or anyone who prefers glue-based projects. The most reliable no-sew method is layering flat felt shapes, rather than trying to make stuffed ornaments. Choose a base shape (like a star or tree), then glue on smaller accent pieces using fabric-safe glue or tacky glue.
To keep no-sew ornaments durable, use these tips. Apply glue sparingly and spread it thinly to prevent seep-through and stiff patches. Press pieces together under a book for 5 to 10 minutes with wax paper in between to protect surfaces. If you are adding beads or sequins, consider using a stronger craft glue designed for embellishments, and allow a full cure time before hanging.
For a “finished edge” look without stitching, cut two base shapes and glue them together with a thin border of glue near the edge. You can sandwich a ribbon loop between layers at the top. Keep these ornaments flat; thick layers of glue and heavy stuffing do not mix well and can cause separation later.
Safety note: if children are crafting, supervise glue use and avoid small beads for kids who still put items in their mouths. A simple felt tree with glued pom-poms can be just as cute as a stitched ornament.
How to Store Handmade Felt Ornaments
Proper storage helps felt Christmas ornaments stay clean, bright, and fuzz-free for years. First, make sure every ornament is fully dry, especially if you used glue. Store them only after the adhesive has cured, usually 24 hours, so pieces do not stick together in the box.
Use a sturdy container with a lid to protect from dust and humidity. Plastic bins work well, but add a moisture absorber packet if your storage area gets damp. To prevent crushing, layer ornaments between sheets of tissue paper or unprinted paper. For heavily embellished ornaments, individual compartments are ideal. You can repurpose an ornament organizer, egg cartons for small pieces, or cardboard dividers inside a shoebox.
Avoid storing ornaments in direct heat, such as near an attic vent. High heat can weaken glue, fade dyes, and make synthetic felt warp slightly. If you used wool or wool blend felt, keep moth prevention in mind. Cedar blocks or lavender sachets can help, and regular airing out also reduces musty smells.
If an ornament gets linty, use a piece of low-tack tape dabbed gently on the surface. For minor wrinkles, press very lightly with a warm iron using a pressing cloth, but test first since some craft felt can melt under high heat.
Frequently Asked Questions About Felt Christmas Ornaments to Make
How long does it take to make felt Christmas ornaments?
Most simple felt Christmas ornaments take 30 to 60 minutes each once you have a template. If you are doing embroidery faces, names, or lots of beading, plan for 60 to 120 minutes. Batch work speeds things up: cut all shapes first, then stitch details, then assemble and stuff. Your first ornament will usually take the longest while you learn spacing and tension.
Why are my ornament edges wavy or puckered?
Wavy edges typically happen when stitches are pulled too tight or when your stitch spacing is uneven. Felt should lie flat without gathering. Try using fewer strands of floss, loosening tension, and keeping stitches the same distance from the edge. If the felt is thin, overstuffing can also distort the seam, so remove a bit of stuffing and redistribute.
What can I use instead of fiberfill for stuffing?
You can substitute small fabric scraps, yarn snippets, or even cotton batting, but avoid anything that is damp, dusty, or likely to attract pests. Fabric scraps create a slightly firmer ornament and can show lumps if pieces are large, so chop them small. If you want a flatter ornament, skip stuffing entirely and make a layered, glued or stitched design.
Can I wash felt ornaments if they get dirty?
Spot cleaning is safest. Use a barely damp cloth and mild soap, then blot and air dry fully. Soaking can loosen glue, distort stuffing, and cause colors to bleed, especially on cheaper felt. If your ornament is wool blend, excessive agitation can cause felting or shrinking. For long-term care, store ornaments clean and dust-free to reduce the need for cleaning.
What is the best way to personalize felt Christmas ornaments?
Personalization looks best when it is stitched rather than written in marker. Add initials with backstitch, sew on a tiny felt letter, or embroider a short name using simple straight stitches. Keep lettering large enough to read from a distance, and use contrasting thread. You can also personalize by choosing colors that match a family theme or adding a small date on the back.
How do I keep small glued pieces from peeling off?
Make sure both felt surfaces are clean and lint-free before gluing. Use a thin, even layer of fabric-safe glue and press firmly. Let it cure the full recommended time, not just until it feels dry. If a piece is stressed, like a tiny scarf end, reinforce it with a couple of small stitches even on a no-sew ornament. Combining light glue with strategic stitches is very durable.
Conclusion
Felt Christmas ornaments are a perfect holiday DIY because they are cute, customizable, and achievable even if you are brand new to sewing. With the right felt, clean cutting, and a consistent edge stitch, you can make ornaments that look polished and hold up through many seasons. Start with one simple shape, like a star or mitten, then build confidence by adding stitched details, light stuffing, and a securely sewn hanging loop. Your next step: choose a small color palette, cut two or three templates, and make a mini set in one evening. Once you see them on the tree, you will want to keep going.

Today Craft Ideas
Sharing simple craft ideas, seasonal inspiration and creative projects for everyday life.