Easy Crochet Flower Pattern
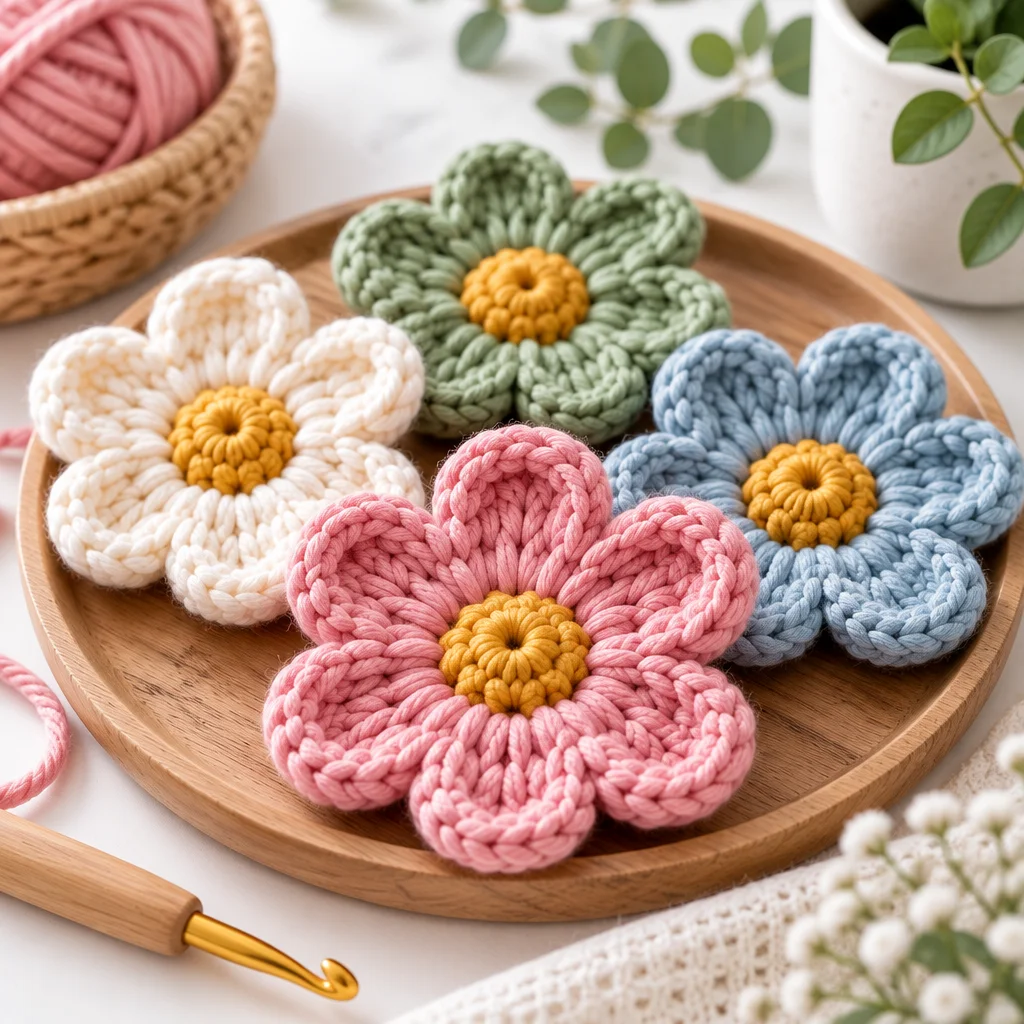
If you have been searching for a simple crochet flower pattern that looks polished but is still beginner-friendly, you are in the right place. Crochet flowers are quick, portable, and satisfying because you can finish one in a single sitting and immediately use it as a decoration or applique. In this guide, I will walk you through an easy, reliable flower that lies flat, holds its shape, and can be made in multiple sizes with small adjustments. You will learn what yarn and hook to choose, how to form a sturdy center, how to build petals that do not curl, and how to attach your finished flower to hats, bags, blankets, and more. By the end, you will have a repeatable process you can customize confidently.
Materials and Yarn
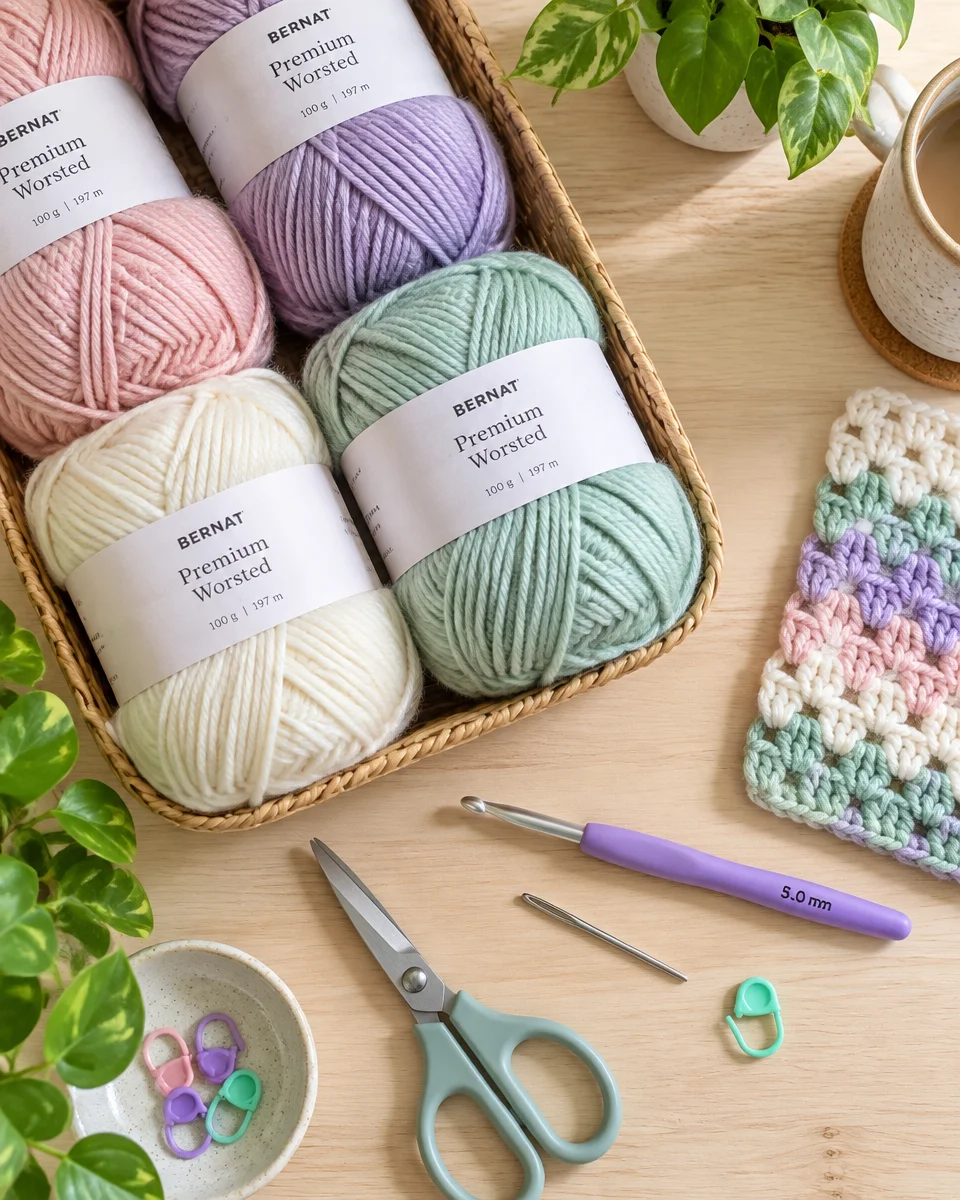
One reason this crochet flower pattern is so popular is that it does not require specialty supplies. You can make it with leftovers from other projects, and it is a great way to practice tension and stitch consistency on something small.
- Yarn: Worsted weight (category 4) is the easiest to learn with because stitches are clearly visible. Cotton gives crisp stitch definition and a flatter finish, while acrylic is soft and springy and often easier to care for.
- Crochet hook: Choose a hook that matches your yarn label, usually 5.0 mm (H/8) for worsted. A slightly smaller hook can help the flower feel firm and hold shape.
- Scissors: Sharp tips help you trim tails cleanly for neater finishing.
- Tapestry needle: Essential for weaving in ends securely and for sewing the flower onto another project.
- Optional stitch marker: Helpful if you lose track of where a round begins, especially when learning.
Preparation tip: pull out two colors if you want a contrasting center and petals. Also, practice making a slip knot and chaining comfortably before starting the flower, because the center ring is where beginners often feel fiddly pressure.
Best Yarn and Hook Size for Crochet Flowers
The “best” yarn depends on what you want the flower to do. For an applique that will be handled often, cotton yarn is tough, washable, and less likely to pill. For a soft, slightly puffy flower, acrylic or a cotton-acrylic blend can work well. If the finished item will need regular washing, check the yarn label for its specific care instructions. If you want a smaller flower for decorative accessories, crochet thread or lighter yarn can create a more delicate result, although the smaller stitches may be harder for a beginner to see and handle.
Hook size affects how firm or flexible the finished flower feels. Start with the hook size recommended for your yarn. If the flower feels too loose or floppy, try a slightly smaller hook. If the stitches feel uncomfortably tight or the flower pulls inward, try a slightly larger hook. Small adjustments are usually enough.
If your petals ruffle heavily, your stitches may be too loose for the yarn. If your flower cups into a bowl shape, the stitches may be too tight or the center ring may be pulling. The good news is that flowers are small: it is easy to redo with a different hook until the shape is exactly what you want
Easy Crochet Flower Pattern
This easy crochet flower pattern uses basic stitches and creates five petals. It works as a flat applique, a small embellishment, or a building block for garlands. Abbreviations used: ch (chain), sl st (slip stitch), sc (single crochet), hdc (half double crochet), dc (double crochet). The pattern is written in US terms.
- Skill level: Beginner
- Yarn: Worsted weight (category 4) yarn
- Hook: Start with the hook size recommended for your yarn; 5.0 mm (H/8) is a common starting point for worsted weight yarn
- Stitches used: Chain (ch), slip stitch (sl st), single crochet (sc), half double crochet (hdc), double crochet (dc)
- Construction: Worked in the round from the center
- Petals: 5
- Crochet terms: US terminology
- Gauge: Not critical for this project. Your yarn, hook size, and tension will affect the finished size.
Make the Center Ring
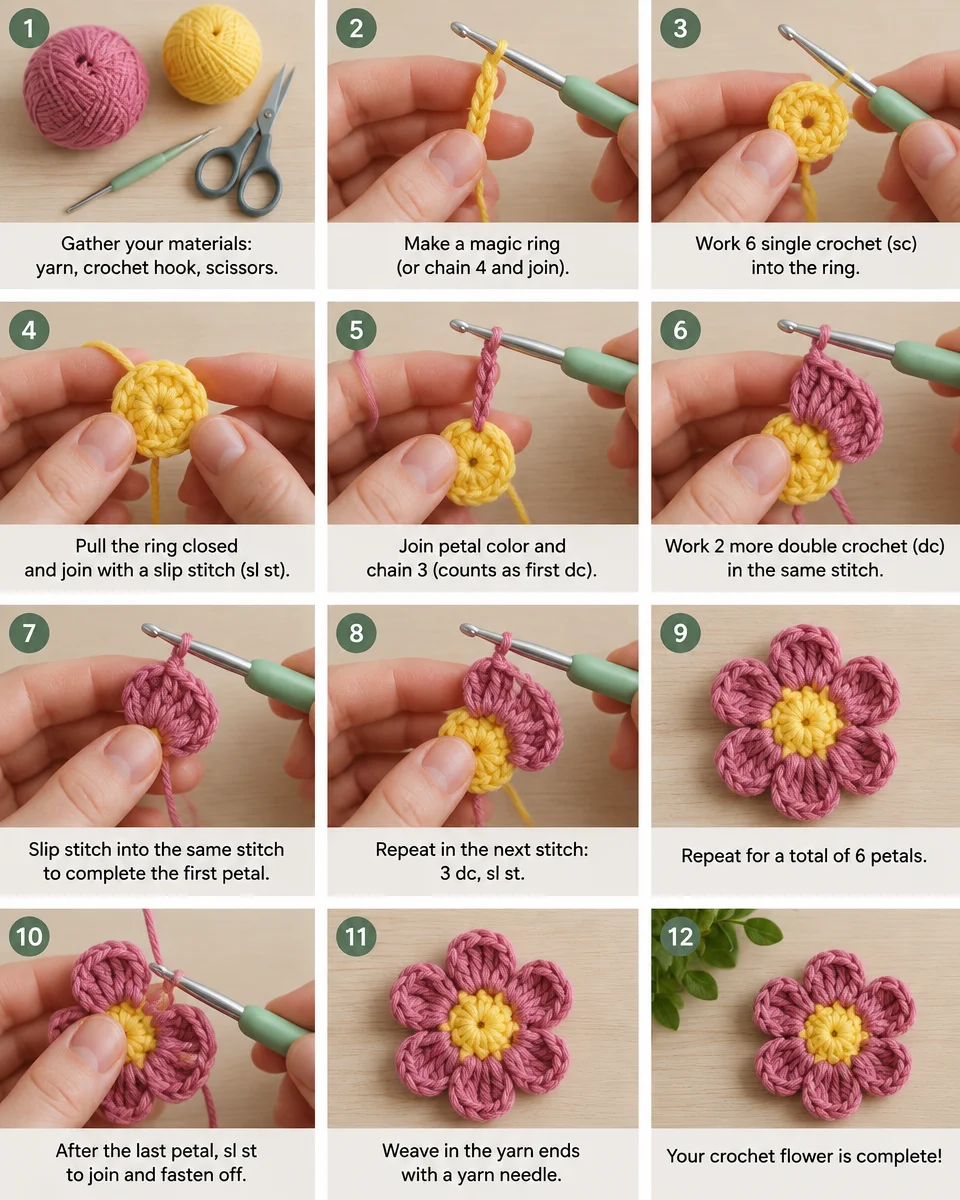
- Make a magic ring (recommended) or ch 4 and join. A magic ring lets you tighten the center neatly so there is no hole. If you chain 4, join with a sl st into the first chain to form a ring.
- Ch 1 to begin Round 1. This gives you height for your first stitch and keeps the edge from pulling.
- Work 10 sc into the ring. Ten stitches create a stable base for five petals without crowding. If using a magic ring, pull the tail firmly to close the center.
- Join with a sl st to the first sc. A clean join keeps the center round and prevents a gap where the petals start.
Crochet the Petals
You will make five petals around the 10-stitch center, using every other single crochet as a petal base.
First petal: Slip stitch into the next single crochet to position your yarn. In that same stitch, work: chain 2, 1 double crochet, 1 half double crochet, 1 double crochet, chain 2, then slip stitch into the same stitch.
Next petals: Skip the next single crochet. In the following single crochet, work the same petal sequence: chain 2, 1 double crochet, 1 half double crochet, 1 double crochet, chain 2, slip stitch into the same stitch.
Repeat this process around the center until you have five petals. Before fastening off, count the petals and check that they are spaced evenly.
Why this works: the ch-2 spaces act like a petal outline, while the dc and hdc build height in the middle. The sl st at the end of each petal anchors it and reduces twisting.
Join and Finish
- After the last petal, join with a sl st. Join to the first sl st or the base of the first petal, whichever keeps the edge neater on your flower.
- Fasten off, leaving a 6 to 10 inch tail. A longer tail is useful for sewing the flower onto something later.
- Weave in ends. Use a tapestry needle to run the yarn tail under several stitches on the back, change direction once, and trim. This prevents the tail from wiggling out with use.
- Shape the petals. Gently tug each petal tip and smooth the center with your fingers to help it sit flat.
How Do You Crochet a Flower for Beginners?
If you are brand new, the key is to slow down at the center and count carefully. Most beginner frustration comes from losing track of stitches, so use a simple checklist: center, count, join, then petals. Start with worsted yarn in a light color so you can see each stitch clearly. Dark yarn can hide loops and make it harder to insert your hook correctly.
For this crochet flower pattern, practice these basics first: making a slip knot, chaining with even tension, and recognizing the “V” top of a single crochet. When you insert your hook, aim under both top loops unless a pattern says otherwise. If you struggle with the magic ring, use the ch-4 ring option while you build confidence. You can always learn the magic ring later.
Finally, do not worry about speed. Your first flower may take longer while you stop to count stitches and check your placement, but the process usually feels much quicker once the stitch sequence becomes familiar. Consistency matters more than pace, especially when you want the petals to match in size.
How Many Petals Should a Crochet Flower Have?
There is no single correct number of petals, but certain counts look balanced and are easier to build from an evenly spaced center. Five petals is a classic choice because it looks floral and symmetrical, and it fits well on many items without looking bulky. Six petals often looks like a daisy and can appear fuller, especially with thinner yarn. Eight petals can create a lush, layered look, but it can also crowd the center if the base round is not increased accordingly.
In this crochet flower pattern, five petals are made by working petals into every other single crochet when the center has 10 sc. Want a different number of petals? You’ll need to adjust the center stitch count and spacing so the petals fit evenly around the flower. For this specific pattern, 10 single crochet stitches work with five petals because each petal uses the spacing created around the center. If you change the number or shape of the petals, treat it as a variation and check the flower as you work to make sure the center stays flat rather than forcing a fixed formula.
How Do You Make a Crochet Flower Bigger?
There are several ways to make your crochet flower larger: use thicker yarn, pair it with an appropriate larger hook, make the petals taller, or add another round. The easiest method is simply switching yarn weight. For instance, making the same flower with bulky yarn produces a larger applique quickly. If you only change hook size, the flower grows slightly, but it may also become looser and less defined, so evaluate the fabric firmness.
For a bigger flower that still looks tidy, adjust the structure:
- Add more center stitches: Increase the number of sc in the center ring so petals have room to spread.
- Make taller petals: Replace the center hdc with a dc, or replace the dc with a treble crochet (tr). Taller stitches create longer petals.
- Add a second petal round: Crochet a new round behind the first petals using back loops or post stitches, then add another set of petals for a layered look.
When enlarging, keep the joins smooth and weave in ends securely, because bigger flowers are more likely to be pulled or snagged when attached to bags, garments, or accessories.
How Do You Keep Crochet Flowers Flat?
A flat flower depends on balanced stitch count, even tension, and smart anchoring. If the center has too few stitches for the number of petals, the petals will pull the circle inward and the flower will cup. If the center has too many stitches, the flower will ruffle like a frill. Start with the recommended counts in this crochet flower pattern, then adjust in small steps of two stitches if needed.
Practical tips that work immediately:
- Use consistent tension: If one petal is tighter, it can twist the whole flower. Try to keep your chains and slip stitches relaxed.
- Do not yank slip stitches: A too-tight sl st can pucker the base of each petal.
- Block if necessary: Check the yarn label for care instructions first. Cotton flowers can often be lightly dampened, shaped, and left flat to dry. For acrylic or other synthetic yarns, avoid direct contact with a hot iron and follow the yarn manufacturer’s care recommendations.
- Shape with your fingers: Gentle stretching and smoothing often fixes minor curling without blocking.
If your flower still cups, redo with a slightly larger hook for the center round only, then switch back for petals. That small change can relax the center and help everything sit flat.
How Do You Attach Crochet Flowers to a Project?
Attaching securely matters because flowers are often placed on high-contact items like hats and bags. The neatest method is sewing with the yarn tail using a tapestry needle. Position the flower, then stitch through the back loops or the dense parts at the base of each petal so your stitches do not show on the front.
Here are dependable attachment options:
- Sew-on applique (best all-purpose): Use whip stitches around the center and a few stitches at petal bases. This keeps the flower from flipping up.
- Join-as-you-go crochet: If adding to a blanket square, you can slip stitch the flower on during edging for a very integrated look.
- Removable decoration: If you want the flower to be removable, attach it using a method designed for the specific finished item and make sure the attachment is secure. Avoid removable or small hardware on items intended for babies or young children.
- Decor-only attachment: For non-washable decorative projects, a suitable craft adhesive may be an option if the material manufacturer recommends it. For clothing, blankets, bags, or anything that will be washed or handled often, sewing the flower in place is the better choice.
Safety note: if making items for babies or toddlers, avoid small detachable parts. Sew flowers down firmly, skip beads/buttons, and inspect regularly for loose stitching.
What Can You Make With Crochet Flowers?
Once you can make one crochet flower pattern confidently, you can create whole projects from repeats. Flowers are versatile because they can be appliques, motifs, or dimensional decor depending on yarn choice and how you assemble them.
- Hats and headbands: One flower becomes a focal point. Add a leaf or two for a botanical look.
- Blankets and pillows: Sew flowers at the corners, along borders, or in clusters. Use matching yarn for subtle texture or contrast yarn for pop.
- Garlands and bunting: Make a dozen flowers and string them along a chain or ribbon. Great for parties and nurseries.
- Gift toppers: Replace a bow with a crocheted flower for a reusable decoration.
- Bags and pouches: Stitch a flower to a simple zip pouch to make it feel handmade and special.
- Scrap-busting projects: Combine multiple colors for a bouquet effect using leftover yarn.
Easy Ways to Customize the Flower
The base crochet flower pattern is simple, which makes it perfect for customization. Small changes in color, stitch height, and finishing can make the same pattern look completely different.
- Two-tone center: Change color after the center round. Join the new color with a sl st and start petals. This creates a clean, defined center.
- Pointier petals: Replace the middle hdc with a dc, and add a picot at the tip (ch 3, sl st into the first ch) between the two dc stitches.
- Rounder petals: Use hdc stitches instead of dc for a softer curve: ch 2, hdc, hdc, hdc, ch 2, sl st.
- Textured center: Instead of 10 sc, try 8 to 12 puff stitches in the ring for a bumpy flower middle. Keep it tight so it does not sag.
- Add leaves: Crochet simple leaves separately (chains plus sc/hdc/dc) and sew them under the flower edge.
- Stiffen for decor: If you want a firmer flower for a decorative project, use a fabric stiffener that is suitable for the yarn or fiber you’re using. Test it on a small sample first and follow the product directions.
When customizing, change only one variable at a time so you can see what caused the difference. That approach helps you learn faster and prevents wasted time.
Frequently Asked Questions About Easy Crochet Flower Pattern
My flower center has a hole. What did I do wrong?
If you used a chain ring, a small hole is normal, but you can minimize it by chaining fewer stitches (try ch 3 instead of ch 4) and tightening the joining slip stitch. If you used a magic ring, the hole usually means the ring was not pulled fully closed or the tail was not secured. Pull the tail firmly, then weave it through several stitches in two directions to lock it.
Why are my petals curling or twisting?
Curling often happens when slip stitches and chains are too tight compared to the taller stitches in the petal. Try relaxing your chains, or go up one hook size for the petal round only. Twisting can also come from working into the wrong place, such as accidentally crocheting into the slip stitch instead of the intended single crochet. Count and identify stitches before each petal.
How do I change colors cleanly between the center and petals?
Finish the center round and join. Fasten off the first color or carry it if you plan to use it again. Join the new color by inserting your hook where the next petal begins, pulling up a loop of the new yarn, then chaining 2 to start the petal. Weave in both tails on the back, running under the center stitches for the neatest look.
Can I use UK crochet terms for this pattern?
Yes, but convert carefully. In UK terms, US single crochet is double crochet, US half double crochet is half treble, and US double crochet is treble. The structure stays the same: a compact center and taller stitches for petal height. If you are following the steps exactly as written, make sure you are using US terminology so the petal size matches expectations.
What is the fastest way to make many flowers for a garland?
Use one yarn color, a smooth worsted weight, and a comfortable hook so you are not fighting splitty strands. Make all the centers first, then all the petals, which reduces start-stop time. Keep your yarn tails a bit longer and weave them in assembly-line style. If you need dozens, consider making a long chain garland first and stitching flowers onto it as you go.
How do I make the flower more durable on items that get washed?
Choose a washable yarn (many cottons and acrylics are machine washable) and sew the flower down in multiple spots: around the center and at two or three petal bases. Weave in ends with a direction change to prevent creep. Avoid glue for washable items. For children’s items, skip buttons and beads and inspect the attachment occasionally for loose stitches.
Conclusion
This easy crochet flower pattern is a perfect small project for building confidence because it uses basic stitches, works up quickly, and gives you a finished piece you can use right away. Focus on a tidy center ring, count your stitches, and keep slip stitches relaxed so the petals spread nicely. Once you can make one flower that lies flat, try changing colors, adjusting petal height, or increasing the center stitch count to explore new looks. Your next step: make three flowers in different yarns you already own, compare how they behave, then pick your favorite version and attach it to a hat, bag, or gift wrap for an instant handmade upgrade.

Today Craft Ideas
Sharing simple craft ideas, seasonal inspiration and creative projects for everyday life.