How to Hem Pants by Hand
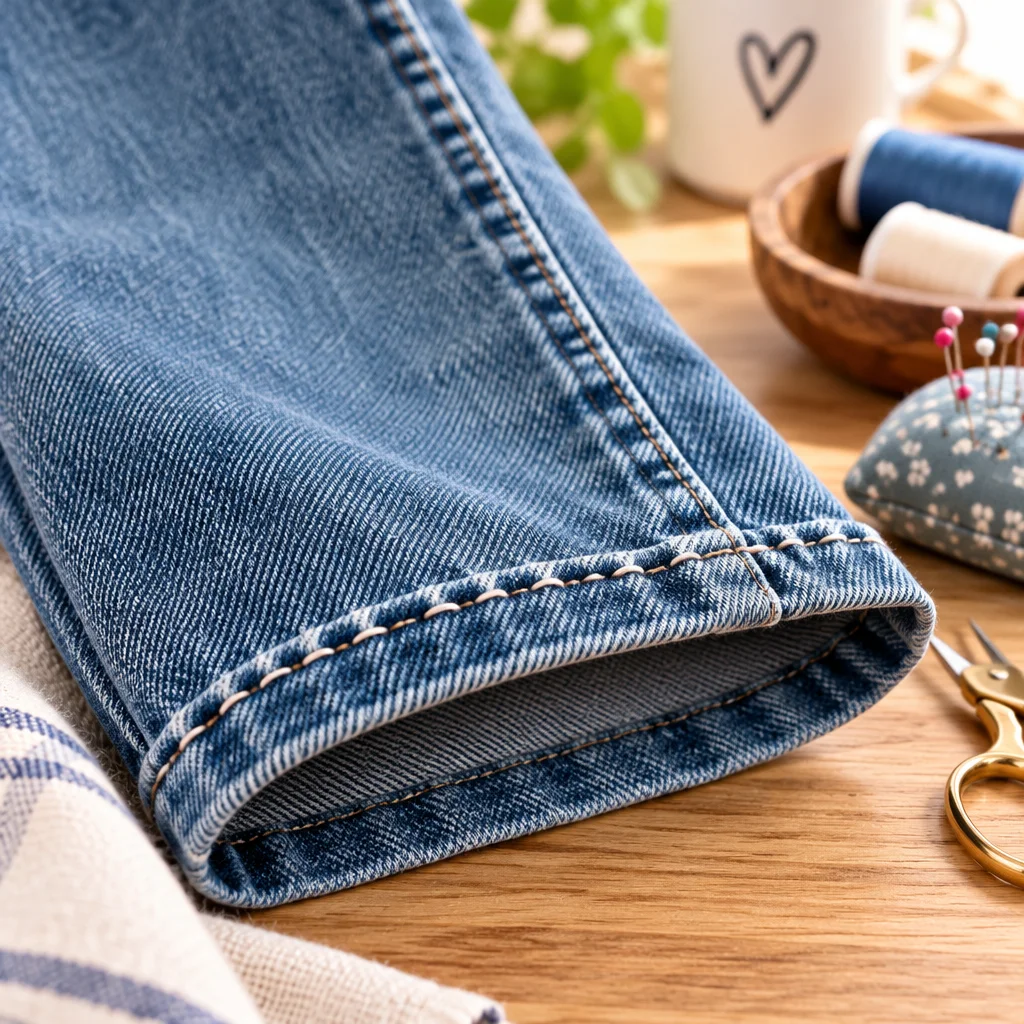
If you have a pair of pants that bunch at the ankles or drag on the ground, learning how to hem pants by hand is one of the most useful clothing fixes you can do at home. You do not need a sewing machine, and you do not need advanced sewing skills. With a needle, thread, and a little patience, you can shorten dress pants, chinos, and even many casual styles so they look intentional and feel comfortable. In this guide, I will walk you through measuring for the right length, deciding how much fabric to keep for the hem, pressing and pinning cleanly, and stitching in a way that stays strong and looks nearly invisible from the outside.
What You Need
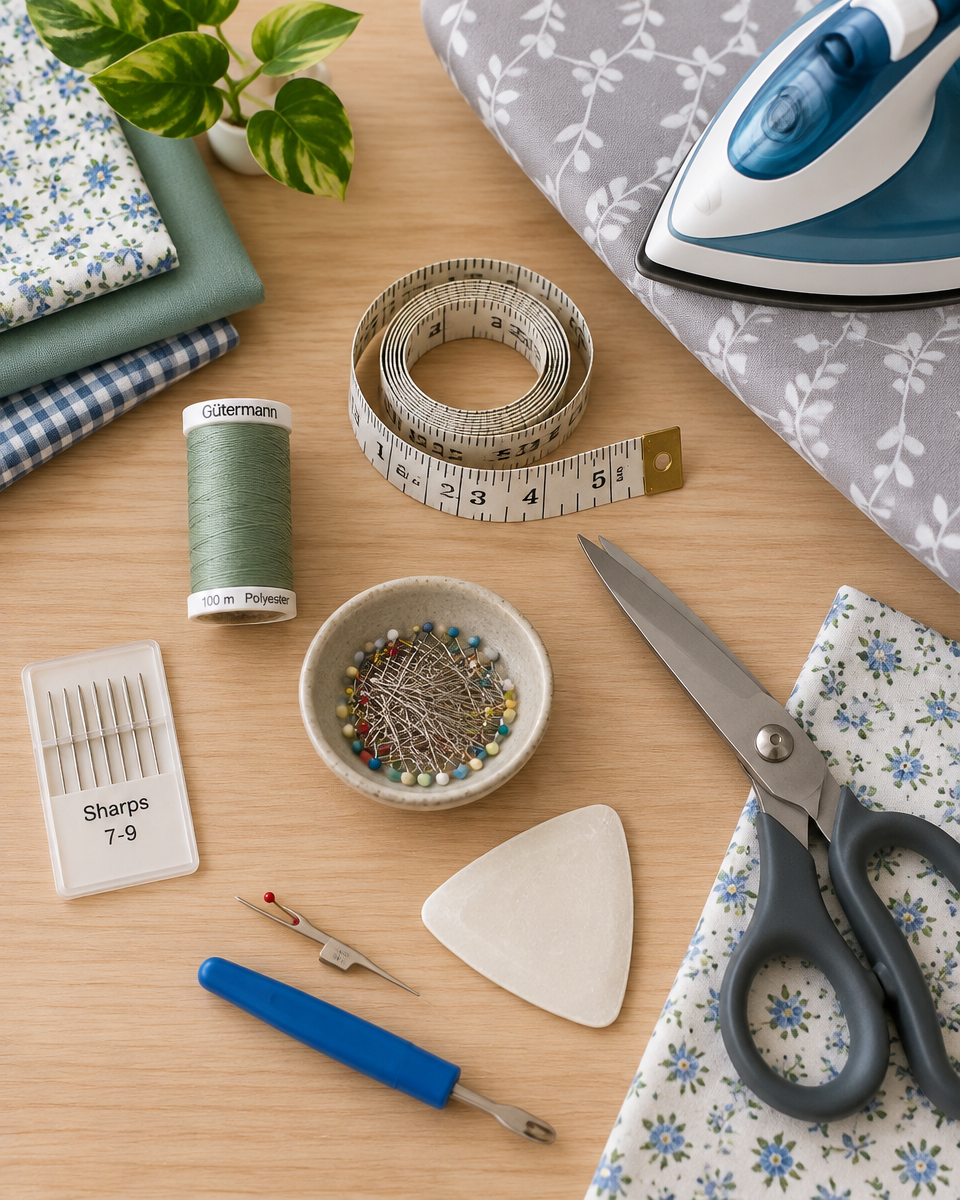
Gathering the right tools makes hemming calmer and more accurate. You can absolutely hem with a basic travel sewing kit, but a few extras help your hem look professional and last through washing.
- Hand sewing needle (sharps size 7 to 9): Sharp needles slide through woven fabric cleanly. For heavier pants, choose a slightly sturdier needle.
- Thread (polyester all purpose): Polyester has a little give and handles wear well. Match the thread color to the pants or go one shade darker for better blending.
- Measuring tape or ruler: A soft tape measure is easiest around the leg, but a clear ruler is great for measuring the fold evenly.
- Straight pins or clips: Pins hold the fold precisely. Clips can be easier on thick fabrics, but pins usually give the most control.
- Fabric chalk or washable marker: Helpful for marking the finished length and fold line without leaving permanent marks.
- Scissors: Fabric shears are best. If you plan not to cut, you can skip these.
- Iron and ironing board: Pressing sets the hem fold and makes hand stitching faster and neater.
- Seam ripper (optional): Useful if you are removing an old hem or opening stitches at side seams.
- Thimble (optional): Saves your finger when pushing through thicker seams like inner leg seams.
Choose a well lit workspace and a comfortable chair. Good light is not just a convenience, it helps you catch uneven folding before you stitch it in.
How to Measure the Correct Pant Length
The most common hemming mistake is measuring while standing in an unnatural posture or wearing the wrong shoes. Measure the pants the way you will actually wear them.
- Put on the pants with your usual shoes. For dress pants, include the shoe style you will wear most often. Heel height changes the drape.
- Decide your preferred break. A “break” is how the hem meets the shoe. No break sits at or slightly above the shoe, slight break makes a small fold at the front, and full break has more stacking. Beginners often like a slight break because it looks tidy but not short.
- Mark the finished length. Pin at the point you want the hem to end. If you are alone, fold the fabric up and use a mirror, or mark with chalk while the pants are on. Make sure both legs match.
- Measure from a consistent reference point. Use the inseam seam as your guide. Measure from the crotch seam down to your mark on each leg and compare numbers. Small differences can happen from manufacturing, so adjust so the finished hems match visually.
Take your time here. Accurate measuring is the foundation of how to hem pants by hand neatly, because you cannot “iron out” a bad length choice later.
How Much Fabric Should You Leave for a Hem?
The amount of fabric you leave depends on the pant style and fabric thickness. Too little allowance makes the hem weak and likely to flip. Too much creates a bulky ridge at the bottom.
- Standard hem allowance: 1 to 1.5 inches (2.5 to 4 cm). This is a good range for most dress pants, chinos, and lightweight woven trousers.
- Thicker fabrics: 1 inch (2.5 cm) can be better. Heavy fabric folds stack up fast. A slightly smaller hem reduces bulk, especially near side seams.
- Very lightweight fabrics: 1.5 inches (4 cm) adds weight. A deeper hem helps lightweight fabric hang straight and prevents flipping.
- If the pants have an original hem you want to mimic, copy it. Measure the original hem depth before removing it, then re create the same depth after shortening.
When you mark the finished length, remember you are marking where the pants will end after hemming. From that line, you will add your hem allowance below it. If you are cutting off extra length, cut only after you have double checked measurements and accounted for the fold. A cautious approach is to leave an extra 0.25 inch (6 mm) until you are sure the fold sits correctly.
How to Pin and Press the Hem
Pinning and pressing are where a “home hem” starts looking store bought. Pressing sets a crisp fold that acts like a roadmap for your stitches.
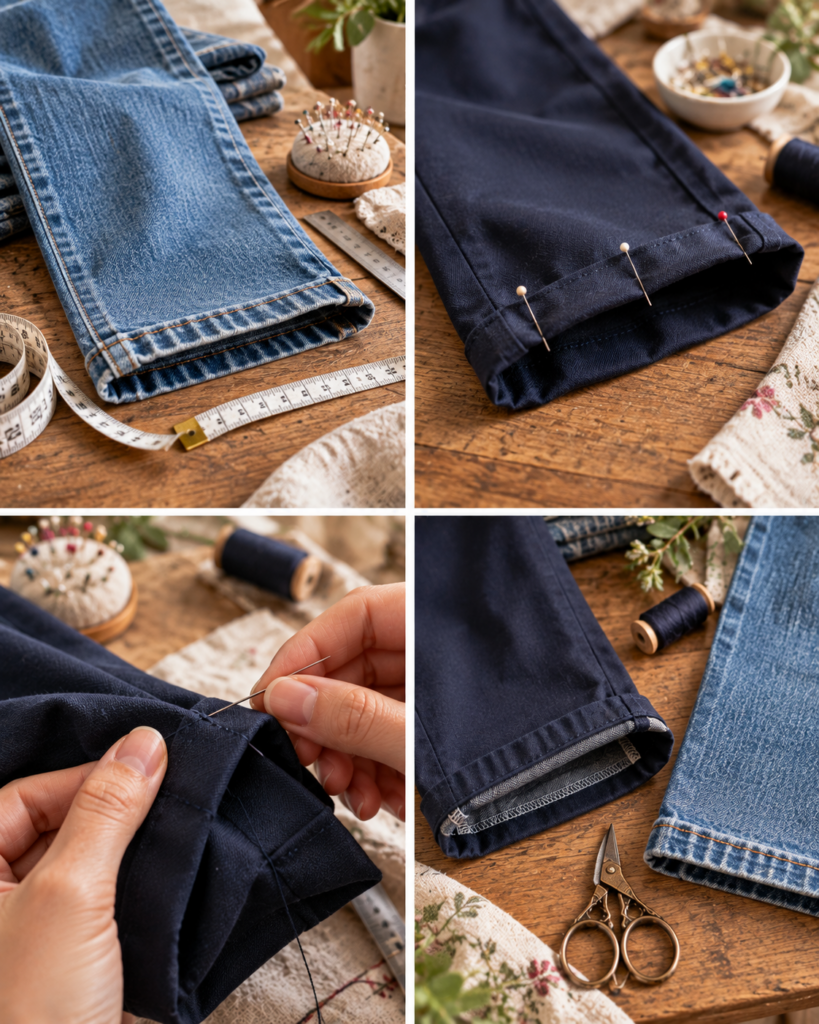
- Turn the pants inside out. Most hand hemming is done from the inside so the outside stays clean.
- Fold up to the finished length. Use your chalk marks or pins as your guide. Smooth the fabric with your hands so it is not twisted.
- Pin perpendicular to the fold. Place pins every 1 to 2 inches (2.5 to 5 cm). Perpendicular pins are easier to remove as you sew and they keep the fold from shifting.
- Check both legs together. Lay the pants flat with inseams aligned and compare hem depth around the leg. This catches unevenness before it becomes permanent.
- Press the fold. Use the iron appropriate for the fabric. If you are unsure, start on a lower heat and use a pressing cloth. Press, lift, and move the iron rather than sliding it, which can stretch fabric.
If the hem area is bulky at side seams, “grade” the fold by trimming a tiny bit of the seam allowance inside the fold, not the pant leg itself. This reduces a lump. Press again after any trimming.
How to Hem Pants by Hand Step by Step
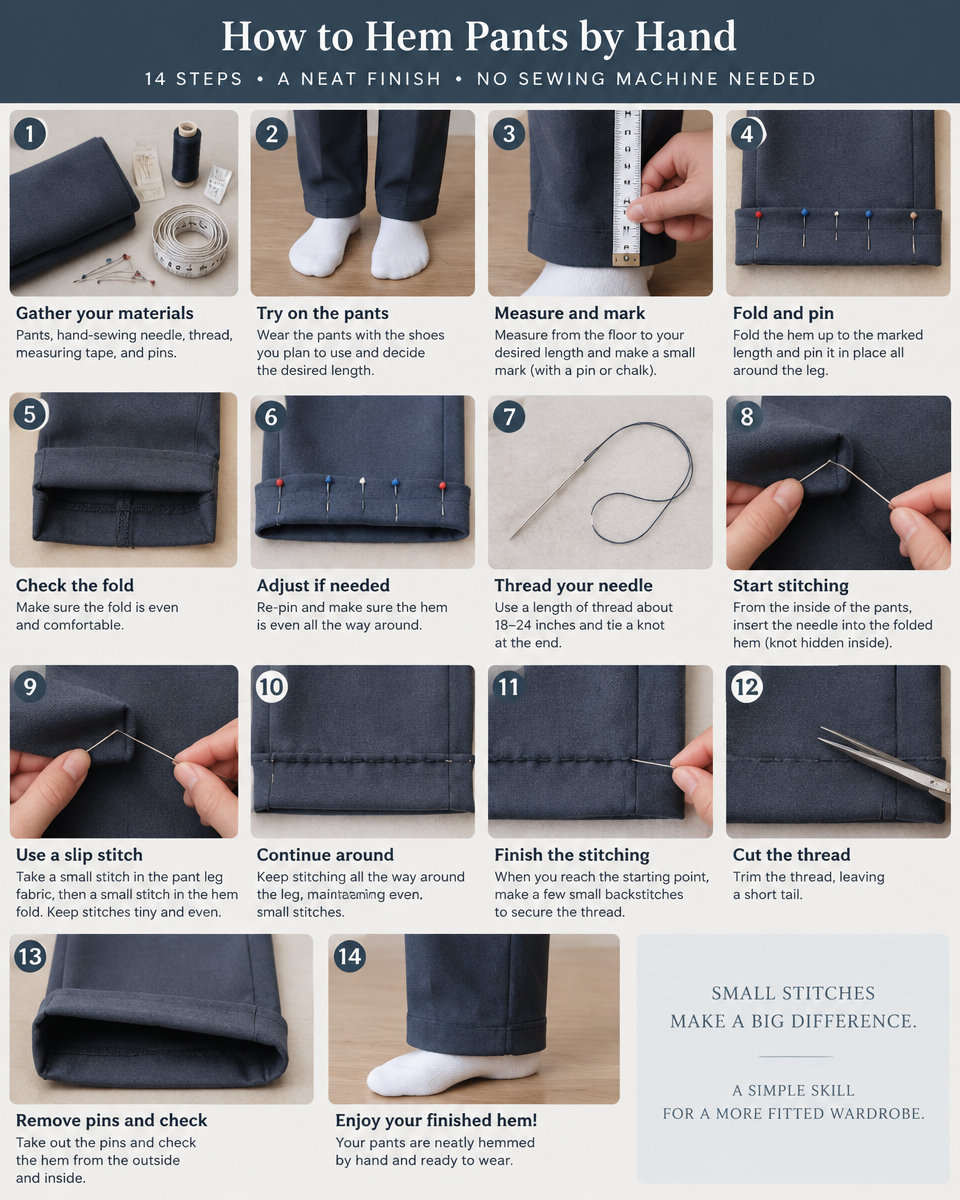
This is the core method for how to hem pants by hand with a clean finish. A blind hem stitch is my go to because it is secure and barely shows on the outside.
- Prepare the hem fold. With pants inside out, fold the hem to the pressed line and pin. If you cut the fabric, finish the raw edge first with a zigzag stitch by hand, overcast stitch, or fray check for fabrics that unravel easily.
- Start at an inner seam. Beginning at the inseam hides your starting knot and makes any tiny irregularity less noticeable.
- Sew slowly around the leg. Remove pins as you go. Keep tension gentle so you do not pucker the fabric.
- Try on before final knot if you are unsure. You can lightly baste the hem (long temporary stitches) and test the length. This extra step prevents regrets.
- Finish and press. When done, press from the inside first, then turn right side out and lightly steam the hem area for a crisp edge.
Thread the Needle
Cut about 18 to 24 inches (45 to 60 cm) of thread. Longer thread tangles and frays. Knot the end with a small, firm knot. If the fabric is slippery, double the thread for strength, but keep stitches small to avoid visible marks. Waxing the thread (running it over beeswax) can reduce tangles and make stitches smoother.
Use a Blind Hem Stitch
With the hem folded up, take a small stitch in the folded hem allowance, then pick up just one or two threads from the pant leg above the fold. Alternate these stitches as you move along. The goal is tiny “bites” of the outer fabric so the stitch is nearly invisible from the outside. Keep spacing consistent, about 0.25 to 0.5 inch (6 to 12 mm) between bites, depending on fabric weight.
Secure the Thread
To finish, take two small stitches in the hem allowance in the same spot to form a discreet knot. For extra security, make a tiny loop knot: pass the needle through the loop before tightening. Trim thread close, but not flush to the knot. Press again.
What Hand Stitch Is Best for Hemming Pants?
The “best” stitch depends on how visible you want the hem to be and how much stress the hem will take.
- Blind hem stitch: Best all around choice for most pants when you want minimal visibility from the outside. It is secure and flexible.
- Catch stitch (cross stitch hem): Great for fabrics that need a little stretch or give, like wool trousers. It forms small X shapes on the inside and distributes tension well, reducing puckers.
- Slip stitch: Very invisible when done correctly, often used for linings and delicate fabrics. It can be slower and may not be as durable on heavy wear areas.
- Fell stitch: Strong, slightly more visible on the inside. Useful if you want a sturdier hem on casual pants where invisibility is less critical.
If you are new and your main goal is a clean look, start with a blind hem stitch. It is forgiving, and it is the stitch most people mean when they search how to hem pants by hand for everyday clothing.
How Do You Hem Pants Without the Stitch Showing?
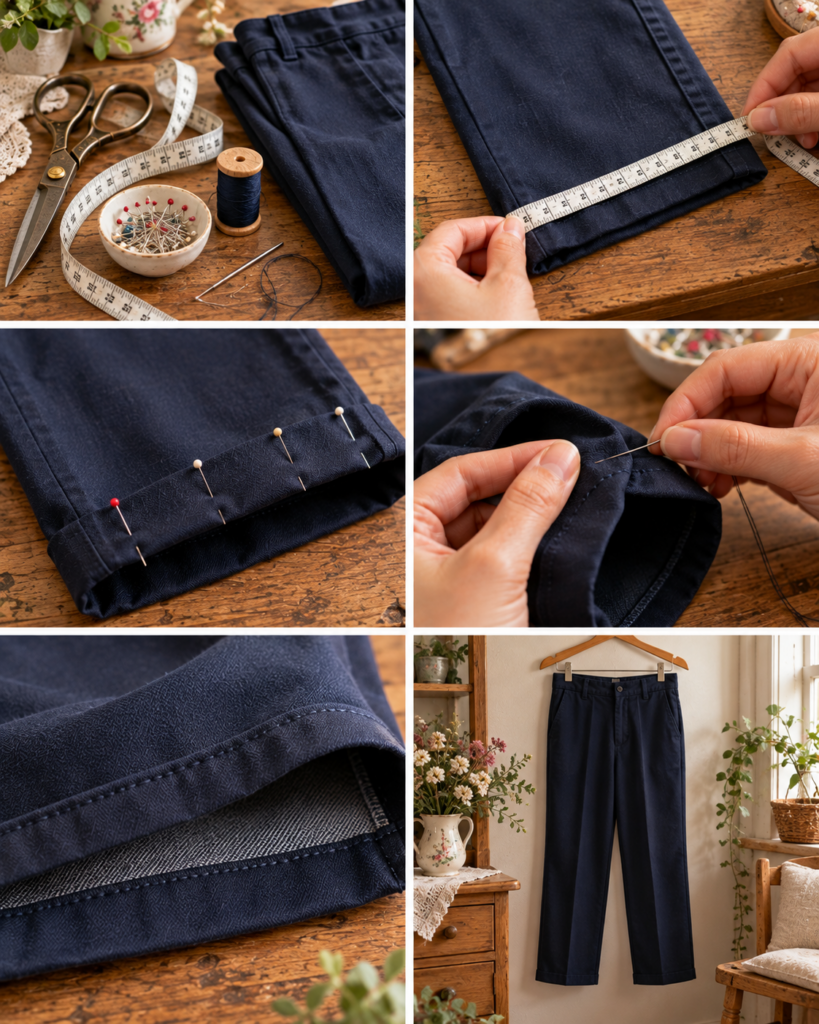
Invisible looking hand hemming is mostly about technique, not secret tools. These details make the biggest difference:
- Use matching thread and a fine needle. Thick thread makes bumps and can show as dots on the right side.
- Pick up fewer outer fibers. When doing a blind hem stitch, grab only one or two threads of the pant fabric. If you can clearly see the stitch on the right side, you are taking too big a bite.
- Keep tension relaxed. Pulling tight makes little dimples on the outside. After each stitch, gently snug it down instead of yanking.
- Press the hem before and after stitching. A pressed fold lies flatter, so stitches settle into the fabric rather than sitting on top.
- Hide your knots at seams. Start and end near the inseam or side seam where tiny marks are naturally less noticeable.
Also consider the fabric texture. On tweed, wool, or textured cotton, stitches disappear easily. On smooth satin like fabric, every needle pick can show, so take extra tiny bites and consider a slip stitch. If your hem still shows, reduce stitch spacing slightly and make the outer bites even smaller.
Can You Hem Jeans by Hand?
Yes, you can hem jeans by hand, and it is a great skill if you do not have a heavy duty machine. Denim is thick, so plan for a bit more effort and use sturdier tools.
- Needle and thread: Use a strong needle and thicker thread, such as topstitching thread, if you want to mimic the original look. If you want a hidden hem, use regular polyester thread in a matching color.
- Manage bulk at seams: The inseam and outseam intersections are thick. Use a thimble, and consider hammering the seam area gently with a rubber mallet before sewing to flatten it.
- Match the original hem (optional): If you want to keep the factory hem look, you can do a “original hem” technique: cut off extra length but keep the original hem band, then reattach it by hand with a strong stitch. This takes time but looks very authentic.
Denim frays, so finish the raw edge inside the hem with an overcast stitch if needed. Work slowly, especially when learning how to hem pants by hand on thick fabric, and take breaks to avoid sore hands.
Can You Hem Pants Without Cutting Them?
Hemming without cutting is a smart option if you might want to lengthen the pants later, if you are altering borrowed clothing, or if you are working with kids clothes you expect to outgrow.
The easiest approach is a “double fold” or “deep fold” hem:
- Fold to the finished length and press.
- Fold the extra fabric up again inside the pants so all raw edges are enclosed. This can create a thicker hem, so it works best on lighter fabrics.
- Stitch the hem in place with a blind hem stitch, catching only tiny bites of the pant leg.
For thicker fabrics where a double fold would be bulky, you can do a “tuck hem”: fold the extra length up inside the leg like a tuck and stitch it at the side seams and inseam only. This keeps the outside clean and is reversible, but it may not hang as smoothly if the tuck is very deep.
One caution: extra fabric inside the leg can change how the pants drape around the ankle. Always try them on and walk around before you commit to the final stitches.
How to Fix an Uneven Hem
Uneven hems happen to everyone, especially on the first few projects. The good news is that hand stitching is easy to undo and refine.
- Identify the cause. Common causes include measuring with different shoes, folding while the pant leg is twisted, or one leg being slightly longer in the original construction.
- Try the pants on and repin. Put them on with shoes and repin the hem to the correct length. Use a mirror and mark the new finished line with chalk. Make sure the pins are level all the way around the leg.
- Unpick only where needed. Use a seam ripper to remove stitches on the longer or shorter side rather than ripping out the entire hem if most of it is correct.
- Repress the fold. Pressing resets the fabric memory and helps the hem line become crisp again.
- Restitch with consistent spacing. Keep your blind stitches evenly spaced and avoid pulling too tight, which can draw one section up.
If one pant leg seems to “ride up” when worn, check if the pant is twisting along the grain. Sometimes the best visual fix is to match the hem to how the pants hang naturally on your body, not to a perfectly measured number on a table.
“I always thought hemming by hand would look messy, but the blind hem stitch made a huge difference. I took my time pressing and it actually turned out cleaner than the old machine hem I was trying to replace.”
Watching the needle motion once can make the blind hem stitch click, especially how small the “bite” on the outer fabric should be. Look for a close up video that shows the stitch from the inside and the final result on the outside. Pause frequently and practice on scrap fabric first, then move to your pants once your stitches look consistent and relaxed.
Frequently Asked Questions About How to Hem Pants by Hand
Do I need to wash pants before hemming?
Yes, if the fabric is washable and especially if it is cotton or denim. Many pants shrink slightly after the first wash and dry. If you hem first, the pants can end up shorter than planned. Wash and dry the pants the way you will normally care for them, then press and measure. For dry clean only trousers, skip washing and use careful pressing instead.
What if my thread keeps tangling while I hand sew?
Use a shorter length of thread, around 18 inches, and rethread when it starts to fray. Thread tangles more when it is too long or when you pull quickly. Let the needle and thread dangle occasionally so it can untwist. Waxing the thread can also help, and keeping your stitches smooth and even reduces snags.
How tight should I pull each stitch?
Snug, not tight. The stitch should lie flat against the fabric without puckering the pant leg. If you see little dents on the outside, loosen your tension and take smaller bites of the outer fabric. A good habit is to pull the thread until it just meets the fabric, then stop. Pressing at the end will help settle everything.
Can I use fabric glue or hem tape instead of sewing?
You can, but it is not always ideal for pants. Some hem tapes hold well on light fabrics but may peel with frequent washing or on thicker materials. Fabric glue can stiffen the hem and may show through on thin fabrics. If you want a long lasting, flexible result, learning how to hem pants by hand with a blind stitch is usually more durable and easier to repair later.
How do I hem tapered or skinny pants so the opening stays even?
Tapered legs can shift while you fold, making the hem opening wavy. Measure the hem depth from the fold line at several points around the leg, not just at the seams. Pin more frequently, and press firmly. If the hem allowance is very wide compared to the leg opening, consider trimming the allowance slightly to reduce bulk and help it sit smoothly.
What if the fabric is stretchy?
Many stretchy pants are knits, and they behave differently from woven trousers. A blind hem stitch can still work, but do not pull tight, and consider a catch stitch for extra flexibility. Press gently with low heat to avoid shine or distortion. If the fabric stretches a lot, basting first helps prevent a rippled hemline. Test your stitch on a hidden area to confirm it stretches comfortably.
Conclusion
Learning how to hem pants by hand is a practical skill that saves money, improves fit, and helps you keep favorite clothes in rotation. The key steps are measuring with the right shoes, leaving a sensible hem allowance, pressing a crisp fold, and using a blind hem stitch with tiny bites so the outside stays clean. If something looks uneven, unpick a small section, repress, and try again. Your next step is simple: choose one pair of pants, gather your tools, and practice the blind hem stitch on a scrap before you sew the real hem. You will get better quickly, one neat stitch at a time.

Today Craft Ideas
Sharing simple craft ideas, seasonal inspiration and creative projects for everyday life.