Winter Crafts for Kids
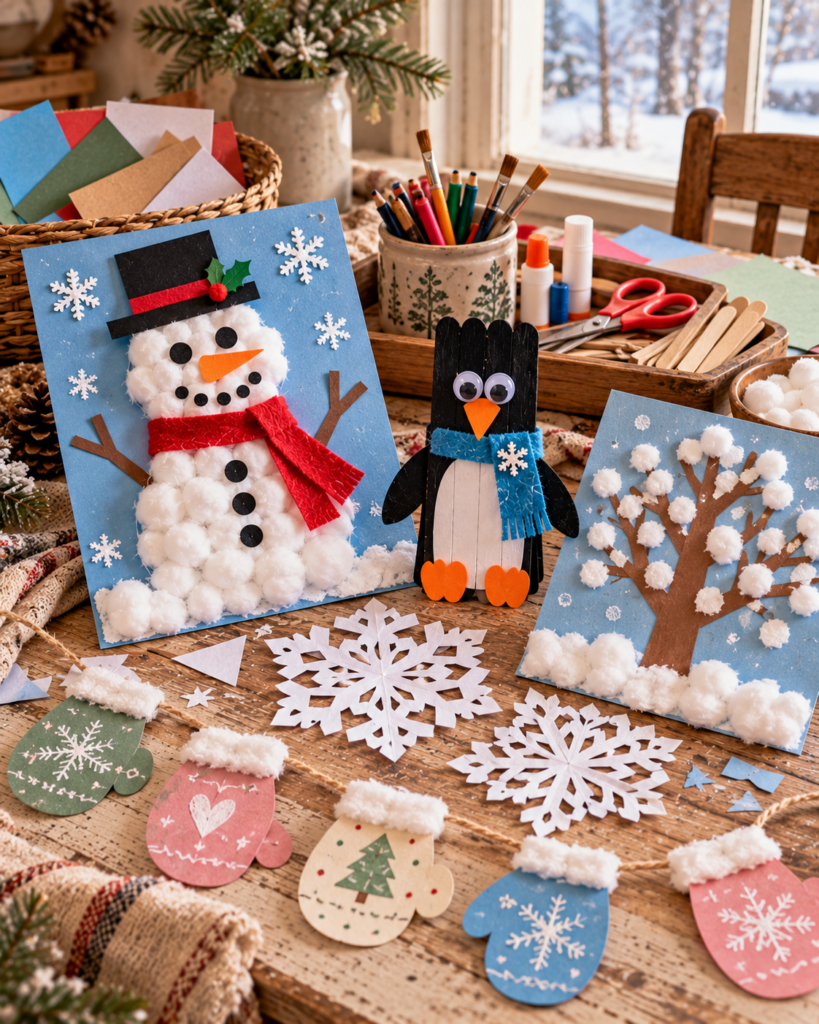
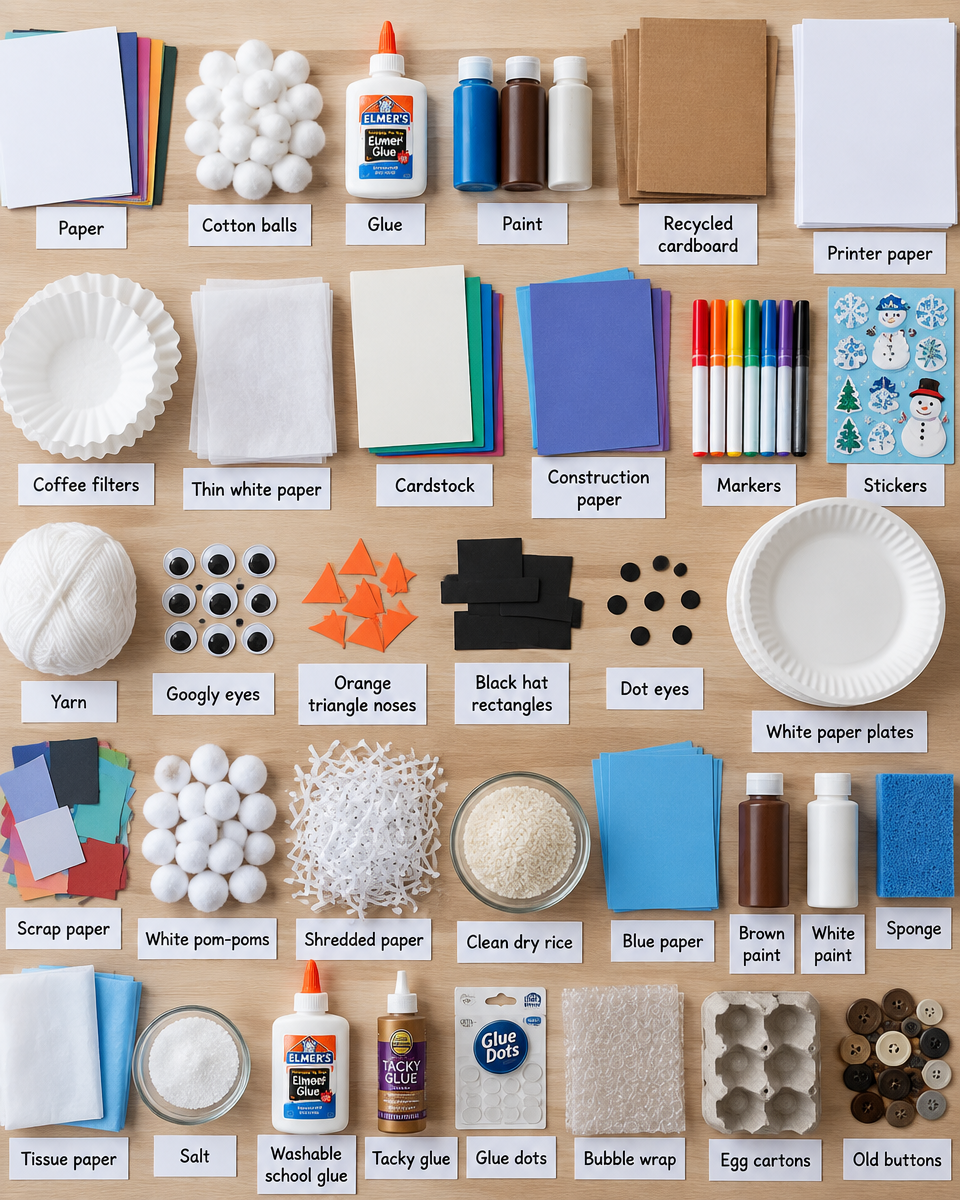
When the days get shorter and everyone is spending more time indoors, winter crafts for kids are one of the easiest ways to keep little hands busy and spirits high. The best winter projects are simple, forgiving, and made with supplies you probably already have, like paper, cotton balls, glue, paint, and recycled cardboard. In this guide, I will walk you through beginner-friendly winter craft ideas that work for preschoolers through elementary ages, plus ways to adapt each for toddlers. You will also find practical tips for reducing mess, choosing the right adhesives, and getting crafts to actually dry and hold together. Pick one idea or plan a whole “winter craft week” with a different theme each day.
Easy Winter Crafts for Kids
If you want quick wins, start with easy winter crafts for kids that use basic shapes and simple assembly. Aim for projects that take 15 to 45 minutes, with an extra drying window if you are painting or using glue. A helpful rule: for younger kids, prioritize large pieces, fewer steps, and materials that are easy to grip.
Basic prep that makes everything smoother:
- Cover your table: A plastic tablecloth, flattened cardboard box, or a few layers of newspaper prevent panic when glue drips.
- Set out “just enough” supplies: Put a small amount of glue or paint on a tray rather than handing over the whole bottle.
- Create a drying zone: A baking rack, sheet pan, or a labeled section of the counter keeps projects safe from curious pets and elbows.
Snowflake Crafts
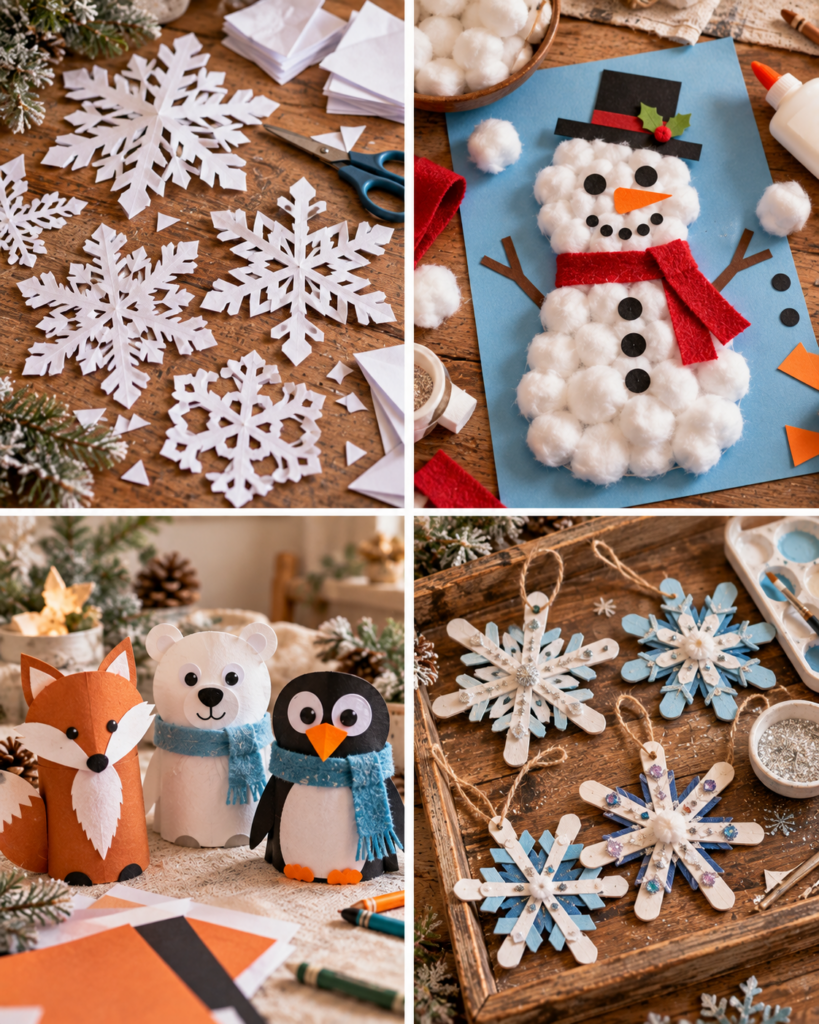
Difficulty: Easy. Time: 10 to 30 minutes. Paper snowflakes are classic because they teach symmetry and scissor skills. Use printer paper, coffee filters, or thin white paper for easier cutting.
- Fold the paper evenly: Fold in half, then in half again. For older kids, fold into thirds to create more points. Crisp folds help the design line up.
- Cut simple shapes near the edges: Triangles, small rectangles, and half-circles create the “lace” effect. Avoid cutting all the way through the center, or the snowflake will fall apart.
- Open slowly and flatten: If it curls, press under a book for a minute. Add glitter glue lines for sparkle, but let them dry flat.
Snowman Crafts
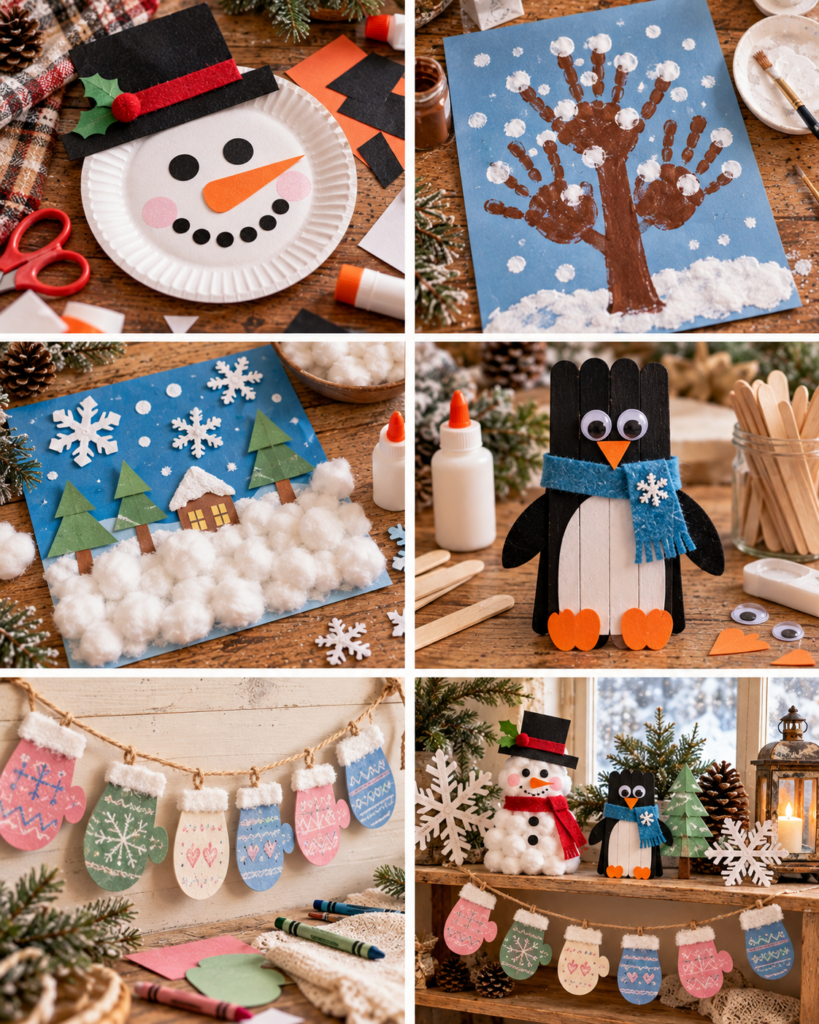
Difficulty: Easy. Time: 20 to 40 minutes. Make a cotton ball snowman on cardstock: draw three stacked circles, spread school glue inside each circle, then press cotton balls or torn tissue onto the glue.
Add details with construction paper: a black hat rectangle, orange triangle nose, and small dot eyes. If you do not have cotton balls, try crumpled white paper for a textured look. For a sturdier version, glue three white paper plates in a vertical row and decorate.
Mitten Crafts
Difficulty: Easy. Time: 20 to 30 minutes. Trace a child’s hand on paper, then round out the thumb area to look like a mitten. Cut two mitten shapes and staple around the edges, leaving the top open.
Kids can “stuff” the mitten with scrap paper for a puffy look, then staple closed. Decorate with markers, stickers, or yarn “stitching” around the edge. This is a great fine motor project that still feels like play.
Penguin Crafts
Difficulty: Easy. Time: 25 to 45 minutes. Cut an oval black body and a white belly oval. Add orange feet triangles and an orange beak diamond folded in half. Googly eyes are fun, but paper circles work too.
To help pieces stay put, glue larger shapes first (body and belly), then add smaller parts once the base is set. If kids struggle with alignment, draw light placement guides on the paper.
Winter Tree Crafts
Difficulty: Easy to medium. Time: 30 to 60 minutes. Paint a bare tree trunk and branches on blue paper using brown paint. While the paint is still slightly tacky, dab white paint with a sponge or crumpled paper towel to create “snow.”
For a mixed-media version, glue small torn bits of white tissue paper onto branches for snow clumps. This is a forgiving technique that looks great even when kids go heavy on the snow.
Indoor Snow Crafts
Difficulty: Easy. Time: 15 to 30 minutes. Make “indoor snow” sensory art using cotton balls, white pom-poms, or shredded paper. Kids can glue the “snow” onto a winter scene template (house, trees, or hills).
If you want a simple sensory bin, use clean dry rice dyed pale blue (optional) and add white pom-poms as snowballs. Always supervise sensory play closely, especially with toddlers who mouth objects.
What Are Easy Winter Crafts for Preschoolers?
For preschoolers, the easiest winter crafts for kids are those with big shapes, predictable steps, and quick visual payoff. Think stamping, tearing, gluing, and simple painting rather than precise cutting. A good preschool craft typically takes 15 to 25 minutes of active work, plus drying time, and can be completed with help but not taken over by the adult.
Great preschool-friendly winter craft formats include:
- Sticker collage scenes: Provide a blue paper background and winter-themed stickers. Add cotton balls for snowdrifts.
- Q-tip painting: Kids “dot” snowflakes or snowfall using white paint and cotton swabs, which builds pencil grip skills.
- Torn paper snowstorms: Tearing white paper into pieces is easier than cutting and strengthens hand muscles.
- Paper plate animals: A paper plate penguin or polar bear uses one main base shape, which helps kids feel successful.
Practical tip: Use washable school glue for most preschool projects. For pieces that keep popping off (like small buttons), switch to glue dots or a thicker tacky glue applied by an adult. Keep decorations larger than a child’s thumbnail to reduce choking risk, and skip loose glitter with very young kids.
What Winter Crafts Can Kids Make With Paper?
Paper is the MVP for winter crafts for kids because it is inexpensive, easy to cut and fold, and stores flat. The trick is choosing the right type: printer paper folds well, cardstock holds shape, and tissue paper adds texture. Here are a few paper-based winter craft ideas that feel special without fancy supplies.
- Accordion-fold snowmen: Fold white paper strips back and forth, then glue the ends to form a honeycomb “ball.” Stack three sizes for a 3D snowman. This is better for ages 6+ with adult help.
- Paper chain garland in winter colors: Cut strips of blue, white, and silver paper, loop and glue into chains. Add mitten shapes every few links.
- Folded paper penguin: Use a simple fold to create a triangular body, then add eyes and belly. Folding is forgiving and builds spatial skills.
- Layered landscape collage: Tear white paper “snow hills,” glue onto blue paper, then add black paper trees and white dot “snowfall.”
Finishing advice: If kids want to hang their paper crafts, punch a hole and use yarn or ribbon rather than tape, which often peels off. If the paper curls from glue, place the finished piece under a heavy book (with scrap paper on top) for 10 minutes once it is mostly dry.
What Can Kids Make on a Snow Day?
On a snow day, you want winter crafts for kids that do not require a trip to the store and can handle a house full of energy. Plan one “active craft” (involves movement like stamping or large painting) and one “calm craft” (collage or threading) so you can reset the mood after lunch.
Try this simple snow-day craft plan:
- Morning: Window snowflakes using coffee filters or printer paper. Tape them to windows with small loops of painter’s tape so they remove cleanly.
- Midday: Snowman name craft: Write each child’s name down a paper strip. Have them glue cotton balls or white circles above the strip as the snowman body, then add buttons and a scarf. It doubles as handwriting practice.
- Afternoon: “Mitten match” craft game: Cut mitten shapes from colored paper. Decorate pairs with patterns, then mix them up and play a matching game once dry.
Troubleshooting for snow-day humidity: Wet mittens and boots can make indoor air more humid, slowing glue and paint drying. Use thinner layers of glue, switch to glue sticks for paper-to-paper where possible, and give projects space. If you have a fan, aim it across the room (not directly at the craft) to improve airflow.
What Winter Crafts Use Things You Already Have?
The most satisfying winter crafts for kids often come from “use what you have” materials. Recycled and everyday items add texture and reduce cost, and they are ideal for last-minute crafting. Before you start, do a quick home scavenger hunt with a small basket for safe items.
- Cardboard tubes: Turn into stamped snowflakes by cutting small slits around the rim and bending points outward. Dip lightly in paint and stamp on paper.
- Egg cartons: Cut cups apart to make tiny penguins or snowmen. Paint, then add paper beaks, scarves, and eyes.
- Old buttons and scraps: Great for snowman buttons or “ornaments” on paper winter trees. Sew-on buttons can be glued, but supervise closely due to choking risk.
- Bubble wrap: Paint and press onto paper to create snowy textures. Use washable paint and do a quick test stamp first.
- Salt and glue art: Draw a snowflake with glue, sprinkle salt, tap off the excess, then drip diluted watercolor onto the salt. The color spreads in a frosty way. Keep salt away from eyes and remind kids not to taste materials.
Durability tip: When crafting with recycled cardboard, use tacky glue for stronger hold, and give it time. Cardboard absorbs moisture, so you may need a longer drying window than you would with paper.
How Do You Adapt Winter Crafts for Toddlers?
Toddlers can absolutely enjoy winter crafts for kids, but the goal is sensory exploration and a finished keepsake, not precision. Plan for 5 to 12 minutes of active crafting at a time and accept that toddlers will do one step repeatedly. That is normal and developmentally helpful.
- Choose safe, large materials: Use jumbo pom-poms, large paper shapes, and non-toxic washable paints. Avoid small buttons, sequins, or mini beads.
- Pre-cut everything: Adults cut the shapes; toddlers glue and place. Offer only 3 to 5 pieces at once to prevent dumping.
- Use the right adhesive: Glue sticks are great for paper. For heavier items, an adult can apply dots of tacky glue while the toddler presses pieces down.
- Try contact paper “sticky collage”: Tape a sheet of clear contact paper sticky-side-up on the table. Toddlers place tissue squares, paper circles, or cotton balls. Seal with another sheet on top for a mess-free window decoration.
Safety note: Always supervise closely and keep craft items out of reach after the session. Wash hands afterward, especially if you used paint, glue, or salt. If your toddler still mouths objects, stick to edible-safe sensory play alternatives and save small craft pieces for older kids.
Tips for Less-Mess Winter Crafting
Less mess means you can say yes to winter crafts for kids more often. The biggest mess-makers are uncontrolled paint, too much glue, and glitter. You do not need to eliminate fun materials, just contain them with smart setup and a few substitutions.
- Portion materials: Pour paint onto a palette or paper plate in small amounts. Put glue in a small dish and use a brush or cotton swab to apply it.
- Choose washable supplies: Washable tempera and washable markers are worth it, especially in winter when windows may be closed and cleanup time matters.
- Use trays: A rimmed baking sheet keeps beads, pom-poms, and scraps from rolling onto the floor. It also doubles as a drying tray you can move out of the way.
- Swap glitter for safer sparkle: Use glitter glue, metallic markers, or small paper confetti. These stay where kids put them and are much easier to clean.
- Dress for success: A big adult shirt worn backward makes an easy smock. Keep a damp cloth nearby for quick fingertip wipe-offs.
Drying tip: Many projects fail because kids pick them up too soon. Set a timer for “touch checks,” and teach them to tap lightly with one finger. If it feels cool and tacky, it needs more time.
“We tried the coffee filter snowflakes and the cotton ball snowman on a snowy afternoon. My 4-year-old finished both without getting frustrated, and the tip about using a tray saved my table from glue puddles. We hung the snowflakes in the window and they still look great a week later.”
Frequently Asked Questions About Winter Crafts for Kids
What glue works best for winter crafts with cotton balls and paper?
For cotton balls on paper, washable school glue works well if you use enough to soak slightly into the cotton. Spread the glue with a brush so you get an even coat rather than a thick blob. If pieces keep falling off, switch to tacky glue applied in small dots by an adult. Glue sticks are best for paper-to-paper shapes but usually are not strong enough for fluffy materials.
How can I make paper snowflakes easier for kids who struggle with scissors?
Use coffee filters because they are thinner and cut more easily than printer paper. Pre-fold them for younger kids and draw simple cutting lines near the edges. Encourage “small bites” with the scissors rather than long cuts, which tear the paper. If cutting is still frustrating, try a tear-and-glue snowflake: tear small white paper bits and arrange them in a snowflake pattern on blue paper.
What are good winter crafts for a classroom or large group?
Choose projects with minimal waiting and limited shared tools, such as Q-tip snow painting, sticker winter scenes, or paper chain garlands. Pre-portion supplies into individual trays or zip bags to prevent crowding at the materials table. Avoid wet paint on large items unless you have a dedicated drying area. A predictable 3-step structure works well: decorate base, add details, add name and hang.
How do I keep kids from using too much paint or glue?
Give smaller amounts and the right applicator. Put glue in a dish and provide a cotton swab or small brush, which naturally limits how much they can pick up. For paint, offer a sponge dabber, Q-tip, or short bristle brush rather than a large brush. Demonstrate one “dot” or “dab” at a time and remind kids they can always add more, but removing extra is hard.
How long should winter crafts dry before we hang them up?
Most paper-and-glue crafts need at least 30 to 60 minutes before gentle handling, and 2 to 4 hours for strong hold, depending on how much glue was used. Painted crafts often feel dry on top in 20 minutes but remain soft underneath. If you are hanging something, wait until it is fully dry so it does not curl or tear. Overnight drying is safest for layered crafts.
Are there winter craft materials I should avoid with young kids?
For toddlers and young preschoolers, avoid small loose items like mini pom-poms, sequins, buttons, and beads due to choking risk. Skip loose glitter because it can irritate eyes and spreads everywhere. Be cautious with strong adhesives like hot glue, super glue, or solvent-based glues, which should be adult-only or avoided altogether for kid crafting. Stick with non-toxic, washable basics whenever possible.
Conclusion
With a little prep and the right expectations, winter crafts for kids can turn long indoor days into creative, cozy memories. Start with one easy win like paper snowflakes or a cotton ball snowman, then build up to winter trees, penguins, and recycled-material projects as confidence grows. Keep supplies simple, use adhesives that match the materials, and plan for drying time so finished crafts actually last. Your next step: pick one project for today, set up a small tray of materials, and create a dedicated drying spot. Once the first craft is hanging in the window, kids usually ask to make another.

Today Craft Ideas
Sharing simple craft ideas, seasonal inspiration and creative projects for everyday life.