Easy Apron Sewing Pattern
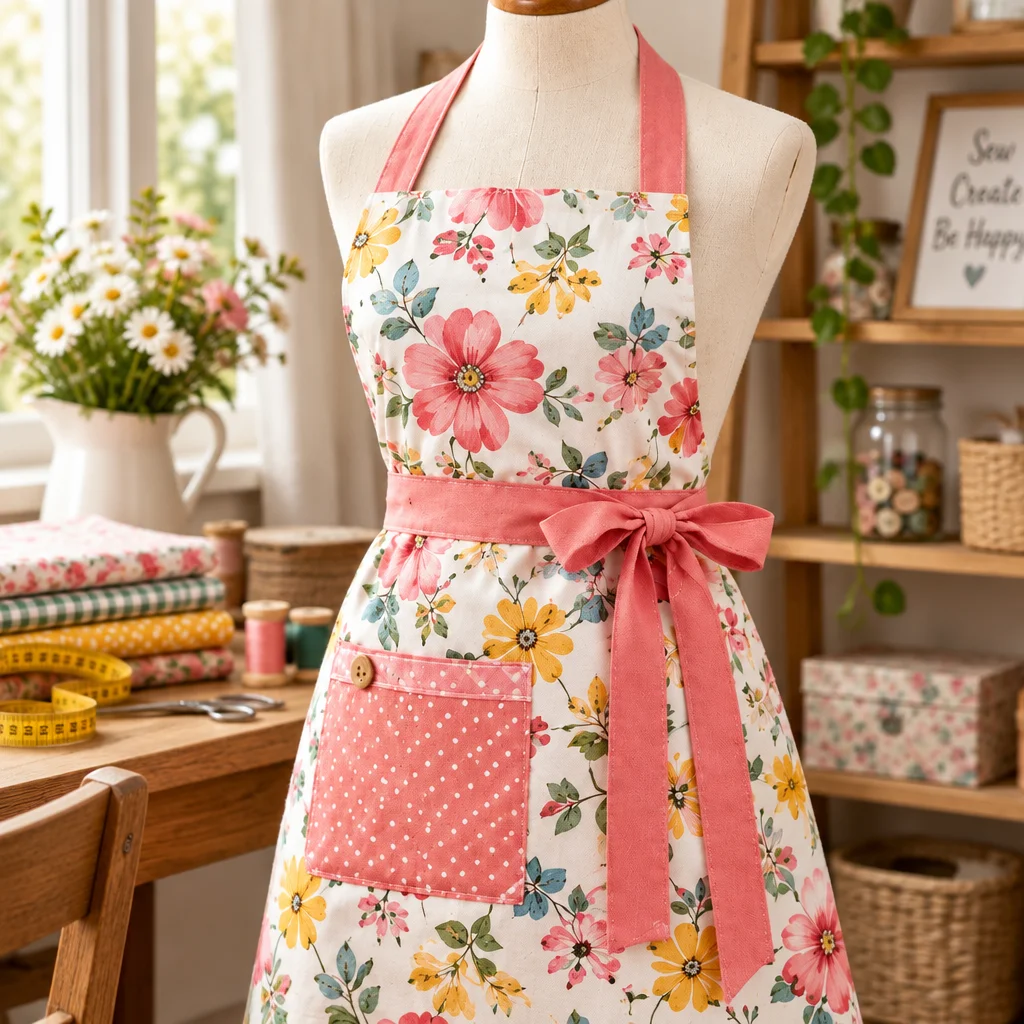
If you are looking for an easy apron sewing pattern that actually works for real life cooking, crafting, or gardening, you are in the right place. An apron is one of the most satisfying beginner sewing projects because the pieces are mostly straight, the fit is forgiving, and you can customize it endlessly. In this guide, I will walk you through fabric choices, sizing, and clear construction steps so you end up with an apron that sits comfortably, covers what you want it to cover, and survives frequent washing. You will also learn how to make sturdy straps, clean hems, and a simple pocket, plus how to troubleshoot common issues like twisting ties or wavy edges.
Materials and Fabric
A successful easy apron sewing pattern starts with simple materials and a few smart choices. Aprons take a lot of wear: they get tugged at the waist, washed often, and exposed to spills. Choose supplies that can handle that, and your sewing will be easier because stable fabric presses and stitches better.
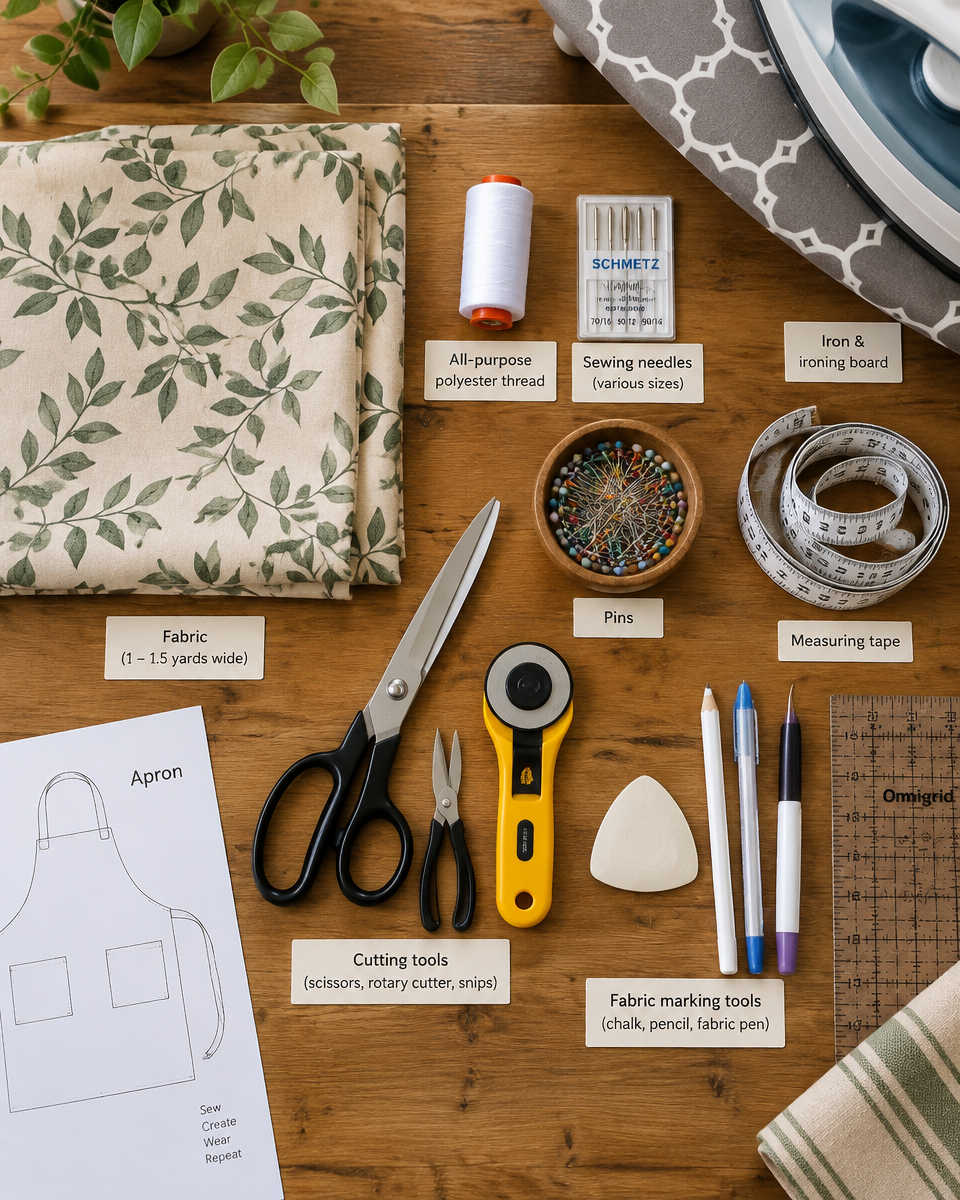
- Fabric: 1 to 1.5 yards of 44 to 45 inch wide fabric is typical. Prewash it first so the finished apron does not shrink later.
- Thread: All-purpose polyester thread is durable and less likely to snap than cotton thread, especially on straps.
- Needles: Universal 80/12 works for quilting cotton; use 90/14 for heavier canvas or denim.
- Basic tools: Fabric scissors or rotary cutter, ruler or measuring tape, pins or clips, iron and ironing board, seam ripper, and fabric marking tool (chalk or washable marker).
- Optional but helpful: Turning tool or safety pin for strap turning, edge-stitch foot, and a walking foot for thick fabrics.
Pressing is not optional for a neat apron. Keep your iron on hand as you sew, pressing folds before stitching. This one habit improves accuracy more than almost anything else.
Best Fabric for an Apron
The best fabric for an apron depends on how you will use it. For an everyday kitchen apron, start with quilting cotton or cotton poplin. These are easy to cut, easy to press, and forgiving to sew, which supports the goal of an easy apron sewing pattern. Cotton also breathes, which matters if you cook near heat.
For heavier-duty tasks like grilling, pottery, or woodworking, consider cotton canvas, denim, or cotton duck. These protect better and last longer, but thickness can make turning straps and topstitching harder. If you choose a heavy fabric, use a slightly longer stitch length (about 3.0 mm) and a sturdier needle.
Linen and linen blends make beautiful aprons with a natural, rumpled look. They can fray more at raw edges, so finish seams carefully and consider a wider hem. Oilcloth and laminated cotton wipe clean, which is great for messy crafts, but they are less forgiving to sew and do not press well. If you try them, use clips instead of pins and finger-press rather than ironing directly on the coated side.
Whatever you choose, avoid very stretchy knits for your first apron. Stretch adds complexity and can distort edges and straps.
Apron Measurements and Sizing
Apron sizing is simpler than garment sizing, but a few measurements make a big difference in comfort. A practical easy apron sewing pattern should tell you how to adjust width, length, and strap placement. The key is deciding what you want the apron to cover and how you want it to hang.
- Apron length: Measure from your upper chest (or just below collarbone) down to where you want the hem. Common lengths range from mid-thigh to knee.
- Apron width: Measure across the front of your body where the apron will sit, usually around hip level. Add ease so it wraps slightly toward the sides.
- Neck strap or bib height: For a bib apron, measure from your chest point up to where the strap feels comfortable. Some people prefer the bib starting lower to avoid feeling restricted.
- Waist tie placement: Ties should sit at or slightly above your natural waist to prevent pulling on your neck.
If you are sewing for someone else, a quick “try-on” with a paper template or pinned fabric rectangle is incredibly helpful. Even a one inch adjustment to strap height can change comfort dramatically.
Easy Apron Sewing Pattern
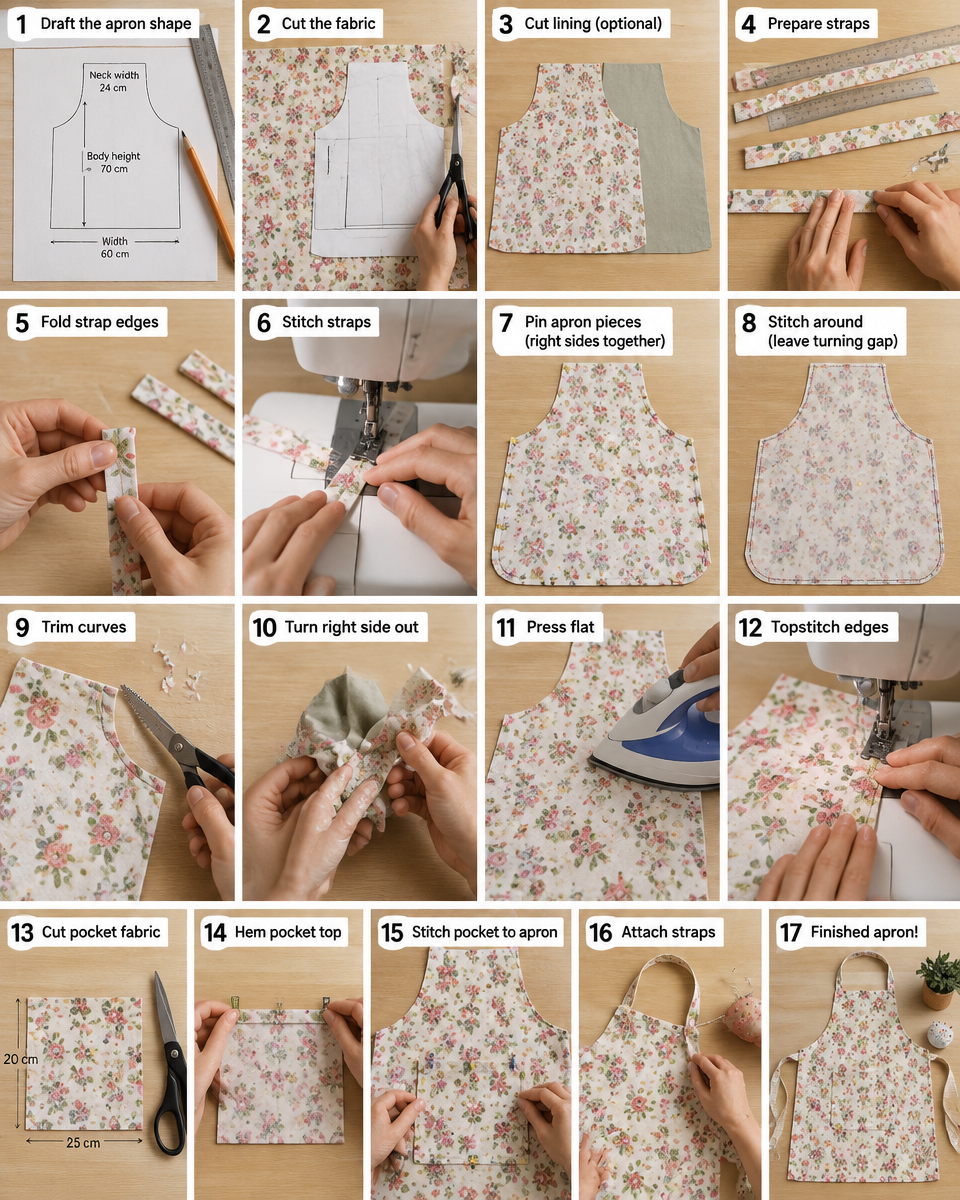
This easy apron sewing pattern is a classic bib apron with one main body piece, two waist ties, and one neck strap. It is beginner-friendly because it uses straight seams, simple turning, and basic hemming. You can draft it from measurements or follow the cutting dimensions below, then adjust as needed. The steps are written to help you get clean, durable finishes that hold up to washing.
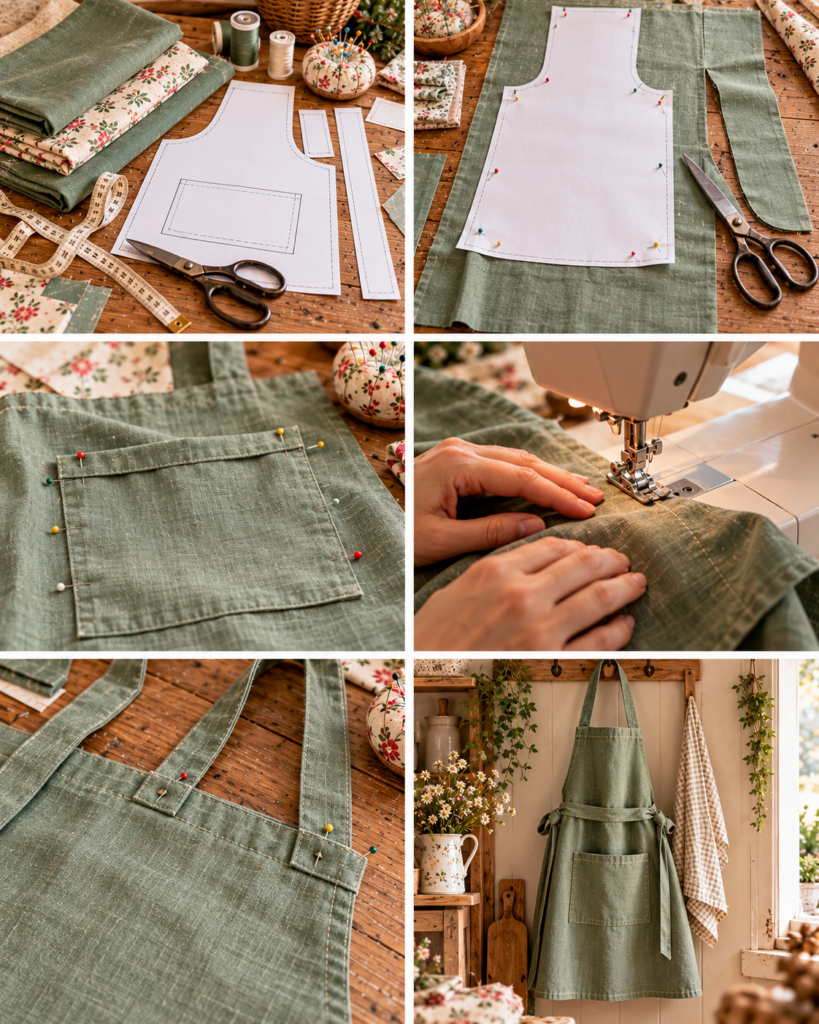
Cut the Apron Body
- Draft a simple shape: Start with a rectangle about 27 inches wide by 32 inches tall for an average adult. Mark the top edge for the bib at about 10 inches wide, centered. This creates the classic “shoulder slope” look.
- Shape the arm curves: From each top corner, draw a gentle curve down to the side edge about 9 to 10 inches below the top. Curves prevent rubbing at the underarm and look more polished.
- Cut one apron body: Cut carefully and keep edges smooth. Any jagged cutting will show in the hem and can cause wavy stitching.
Make the Straps
- Cut strap rectangles: Cut two waist ties, each about 3 inches wide by 30 to 36 inches long. Cut one neck strap about 3 inches wide by 20 to 24 inches long. Longer waist ties are easier to tie in a bow.
- Fold and press: For each strap, press in half lengthwise, wrong sides together. Open, then press both long raw edges to the center crease.
- Stitch to finish: Fold along the center crease again, enclosing raw edges, and topstitch close to both long edges. This makes straps sturdy and prevents fraying without complicated seam finishing.
Hem the Edges
- Press a narrow double hem: Press 1/2 inch to the wrong side all around, then press another 1/2 inch to encase raw edges. Use lots of steam and take your time on curves.
- Clip curves: On inward curves, make tiny snips into the first fold (not through the second fold) so the hem lays flat. This prevents puckers.
- Topstitch the hem: Stitch about 1/8 to 1/4 inch from the inner folded edge. Keep your stitching consistent for a professional look.
Attach the Straps
- Mark placement: On the apron front, mark waist tie positions at the side edges, usually 1 to 2 inches above the widest hip point. Mark neck strap positions at the top bib corners.
- Secure ends: Insert strap ends under the hem fold at each marked spot by about 1/2 inch. Pin or clip firmly.
- Stitch and reinforce: Stitch through the hem and strap end, then sew a small box with an X inside (a box-X) for strength. This reinforcement matters because ties are pulled repeatedly.
When you are done, tug firmly on each strap to test attachment before the first wash. If anything shifts, add another line of reinforcement stitching now, not after it rips later.
How Much Fabric Do You Need for an Apron?
Fabric needs depend on apron style, size, and whether you are cutting straps from the same fabric. For a standard adult bib apron using this easy apron sewing pattern, plan on 1 to 1.25 yards of 44 to 45 inch wide fabric. This usually fits the apron body and straps if you place pieces efficiently and keep straps a bit shorter.
If you want long waist ties that wrap around and tie in front, or if you are making a larger apron, plan for 1.5 yards. If your fabric is directional (the print has an obvious “up”), you may need extra because you cannot rotate pattern pieces to save space. For 54 to 60 inch wide fabric, you can often make an apron with 1 yard, sometimes less, because straps fit beside the body easily.
Also consider shrinkage. Cotton can shrink 3 to 5 percent, sometimes more, so prewashing is part of accurate fabric planning. If you are adding a pocket with a contrasting fabric, a fat quarter or 1/4 yard is usually enough.
What Size Should an Apron Be?
A good apron size is the one you will actually wear. For many adults, a comfortable finished size is about 26 to 28 inches wide and 30 to 34 inches long. Width determines coverage and how securely the apron stays put when you move. Length determines protection and comfort, especially when sitting down.
For petite wearers, try 24 to 26 inches wide and 28 to 31 inches long. For plus sizes, 30 to 34 inches wide is often more comfortable, with longer waist ties. A child’s apron can be scaled down easily: start around 18 to 20 inches wide by 22 to 26 inches long, and shorten straps significantly.
The bib portion is where personal preference matters most. Some people like a tall bib for full coverage; others prefer it lower for comfort. As you work through the easy apron sewing pattern, consider basting the neck strap and doing a quick try-on before final reinforcement stitching. This small step can prevent an apron that pulls on your neck or sits too high.
Can a Beginner Sew an Apron?
Yes, a beginner can absolutely sew an apron, and it is one of the best first projects because it teaches transferable skills: measuring, cutting, pressing, hemming, and topstitching. This easy apron sewing pattern avoids complicated fitting and uses simple construction, so you can focus on accuracy and neat finishing.
To make it beginner-smooth, set yourself up for success. Choose a stable cotton fabric, use a sharp needle, and press at every stage. If you are nervous about curves, keep the arm curve gentle rather than dramatic, and go slowly while hemming. Also, do not skip practice stitching. Sew a few test lines on scraps to dial in stitch length and tension, especially if you are sewing through multiple layers at strap attachments.
“I made this as my first real sewing project. The strap folding method made sense, and the box-X stitching kept the ties from ripping when my kids tugged on them. My hems were a little wavy at first, but pressing and slowing down fixed it on the second try.”
How Wide Should Apron Ties Be?
Apron ties should feel comfortable, lie flat, and be strong enough to handle pulling. A reliable guideline is finished ties about 1 to 1.25 inches wide. To get that width with the folded, topstitched method in this easy apron sewing pattern, start with straps cut about 3 inches wide. After folding raw edges inward and stitching, you end up with a sturdy tie that does not feel rope-like.
For a softer feel at the neck, you can go slightly wider, around 1.5 inches finished, especially if you dislike pressure on your neck. If you choose a wider strap, keep your stitching straight and add an extra line of topstitching for stability. For children’s aprons, 3/4 to 1 inch finished ties are usually enough and easier to tie in a small bow.
Length matters as much as width. Waist ties of 30 to 36 inches each suit most adults. If you want to wrap and tie in front, go longer, around 38 to 45 inches each, depending on waist size and preference.
How to Add a Pocket
A pocket is the feature you will use every day, so it is worth sewing it carefully. You can add a single large pocket or divide it into sections. With this easy apron sewing pattern, a pocket is easiest to add after hemming the apron body but before final strap reinforcement, so you can position everything cleanly.
- Choose pocket size: A practical adult pocket is about 12 to 14 inches wide by 7 to 9 inches tall. Cut one rectangle and decide if you want a center divider for utensils or a phone.
- Finish the top edge first: Fold the top edge down 1/2 inch, press, then fold another 1/2 inch and stitch. This creates a clean opening that will not fray.
- Press pocket seams: Press the other three sides 1/2 inch to the wrong side. Use a ruler to keep corners square.
- Position on the apron: Try the apron on and mark a comfortable pocket height. Many people like the pocket top around 4 to 6 inches below the waist tie line.
- Stitch and reinforce: Topstitch around the sides and bottom close to the edge, then stitch a second line 1/8 inch inside for durability. Add small triangles or bar tacks at the top corners to prevent ripping.
- Add dividers (optional): Stitch vertical lines from the pocket bottom up to the top hem. Backstitch at the top of each divider because this area gets stressed.
Frequently Asked Questions About Easy Apron Sewing Pattern
My hem looks wavy on the curves. What did I do wrong?
Wavy hems usually come from not clipping the first fold on inward curves or stretching the fabric as you sew. Press the curve thoroughly, add small clips into the seam allowance (not past your fold line), and stitch slowly. If the fabric is lightweight, slightly shorten stitch length and avoid pulling from behind the presser foot.
How do I keep straps from twisting after washing?
Twisting often happens when straps are not stitched evenly along both sides or when the fabric grain is off. Cut straps with the lengthwise grain parallel to the selvage, press carefully, and topstitch close to both long edges. For extra stability, add a third line of stitching down the center of the strap.
Can I make this apron without a neck strap?
Yes. Convert the pattern into a cross-back apron by sewing two long straps to the top bib corners, crossing them at the back, and attaching them to the opposite waist sides. It takes a bit of fitting, but it removes neck pressure. Reinforce all strap points with a box-X because cross-back straps carry more load.
What seam allowance should I use for this project?
Since this easy apron sewing pattern relies on hems rather than sewn seams, the main “allowance” is your hem width. A double 1/2 inch hem is sturdy and beginner-friendly. For pocket edges, 1/2 inch folds are also easy to measure and press consistently.
My stitches skip on thick strap attachments. How can I fix it?
Skipped stitches usually mean the needle is too small or dull for the thickness. Switch to a fresh 90/14 needle for canvas or multiple layers, and lengthen stitch to about 3.0 mm. Sew slowly, and use a hump jumper or folded scrap of fabric behind the presser foot to level it as you climb onto thick areas.
Is it safe to use long ties in a busy kitchen?
Long ties are convenient, but keep safety in mind. Avoid dangling ends near open flames or stovetops. Tie a secure bow and tuck the tails into the sides of the apron if needed. For kids, shorten ties to reduce snag risk, and consider Velcro or snap closures only if you can sew and secure them very firmly.
Conclusion
An apron is a practical project that builds core skills, and this easy apron sewing pattern gives you plenty of room to customize while staying beginner-friendly. Focus on three things for a result you will love: choose a stable fabric, press every fold before stitching, and reinforce strap and pocket stress points. Once you have made one, you can easily sew a second with upgrades like contrasting pockets, longer ties, or heavier canvas for messy jobs. Your next step is simple: pick your fabric, prewash it today, and measure an apron length you will actually enjoy wearing. Then set aside an afternoon and sew with confidence.

Today Craft Ideas
Sharing simple craft ideas, seasonal inspiration and creative projects for everyday life.